

Before & After: My Sister’s Budget Bedroom Makeover
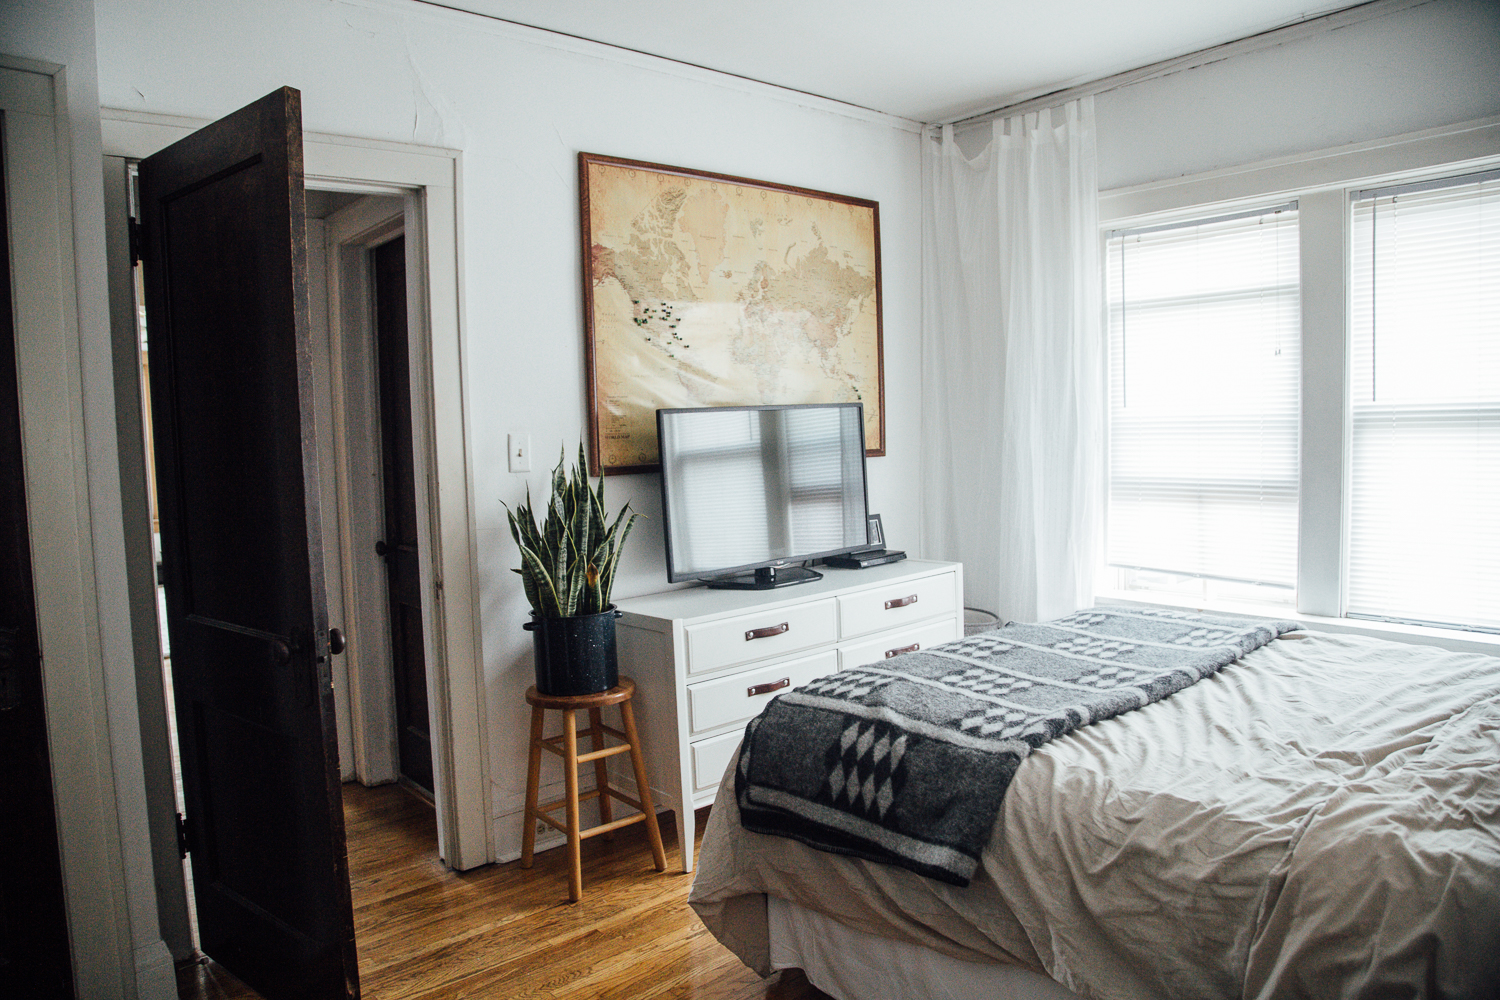
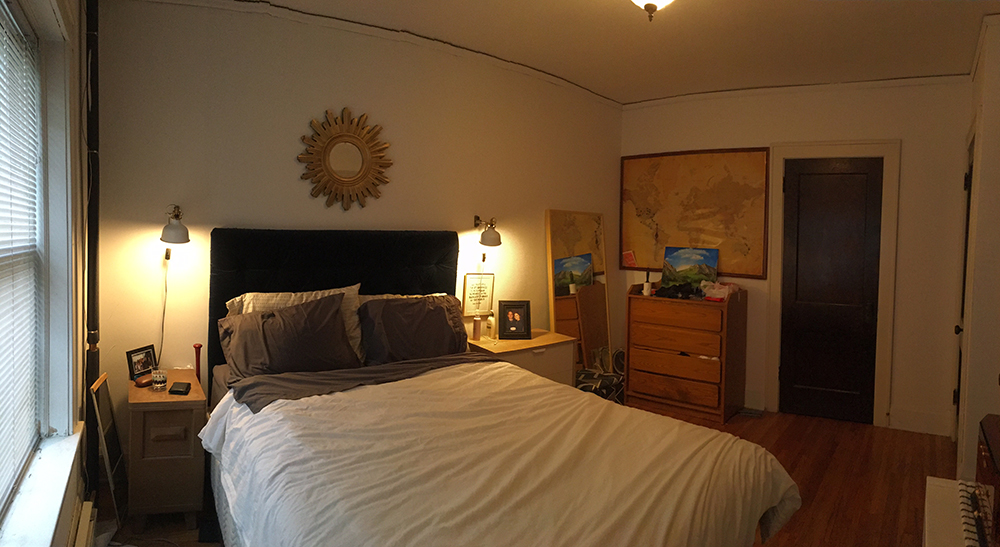
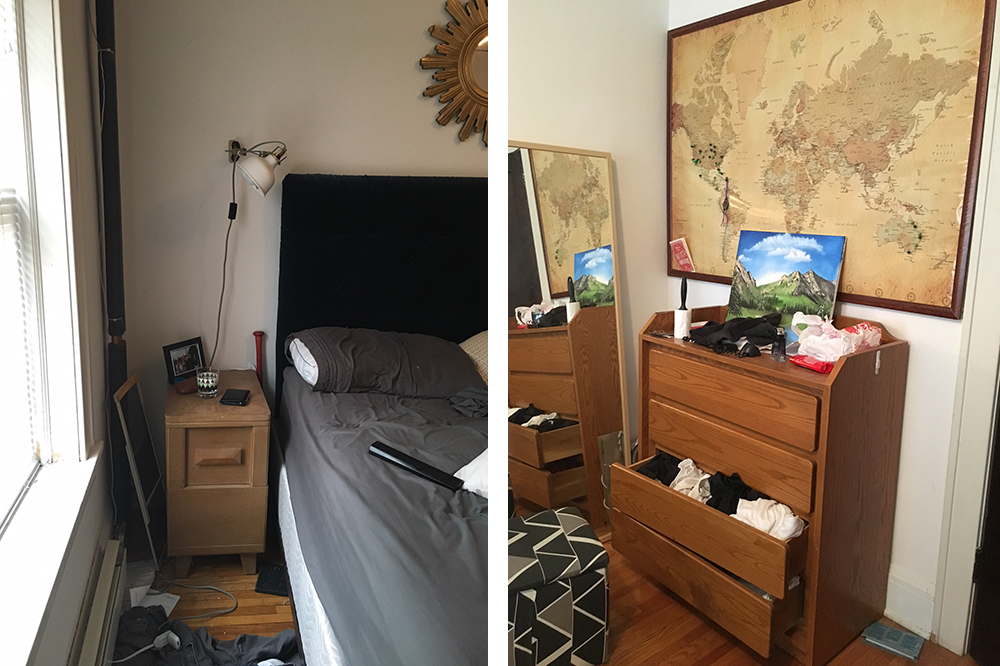
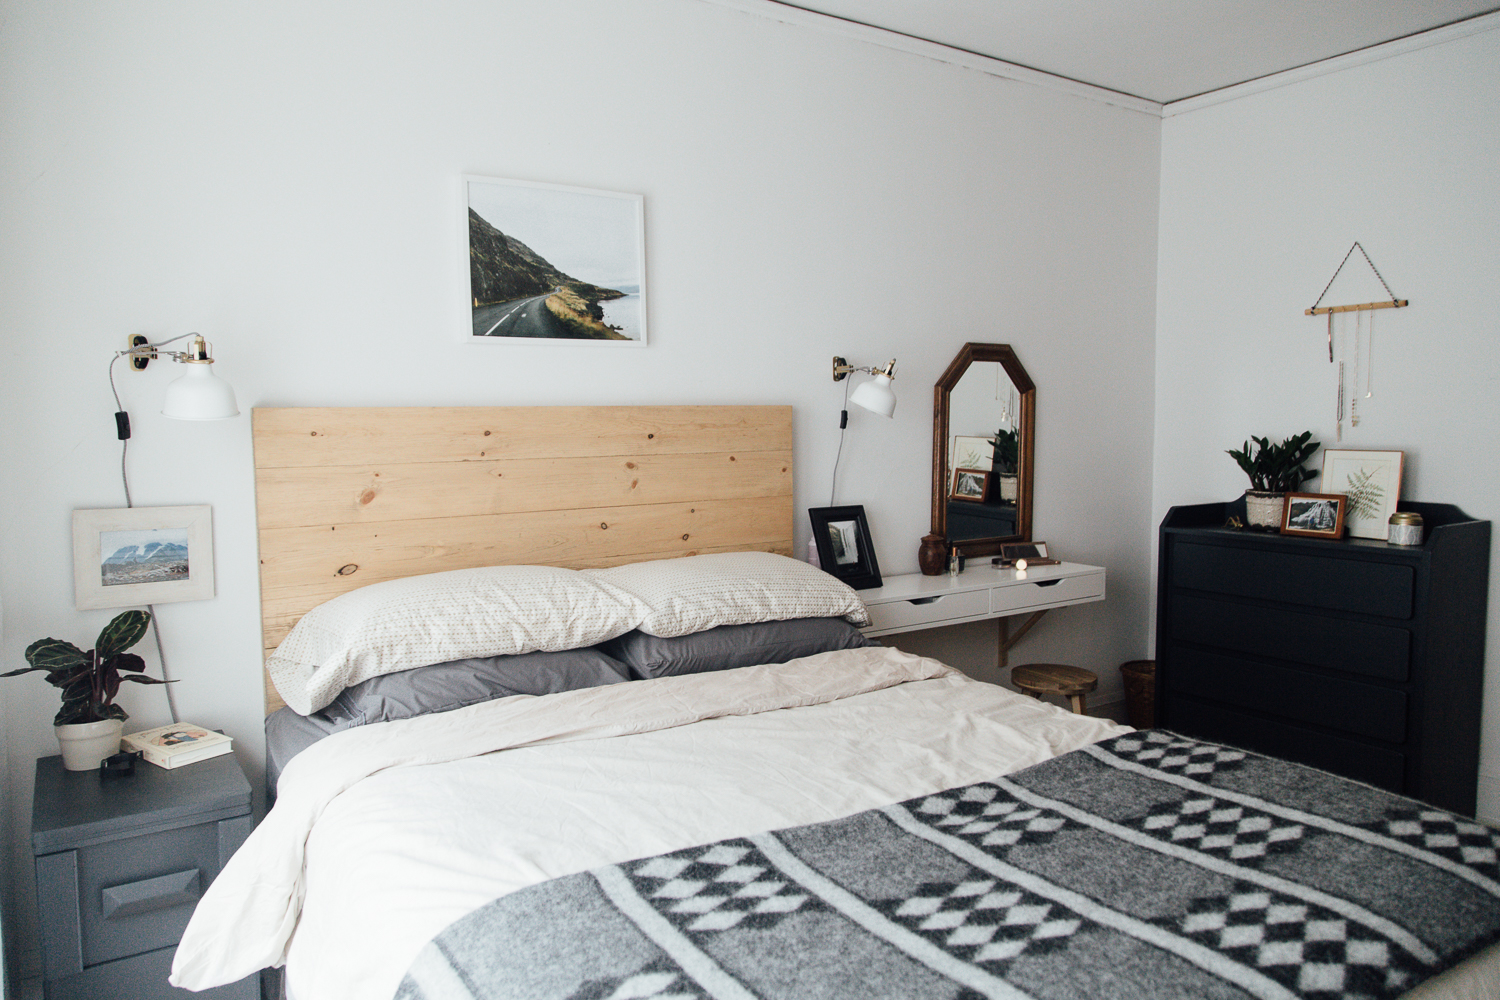
Here’s a look at the before photos of the bedroom. They definitely needed a good shakeup in their organizing. I had them swap dressers to create zones in the bedroom, which made for an overall better flow to the space. One of the biggest hurdles for me was making a space for Kimberly to use to get ready in the mornings. My solutions was a dual purpose wall shelf with drawers from Ikea. I love how simple it is, that is has drawers and doesn’t over power the space. I also added a lot of height to the space by hanging curtains all the way from the ceiling and hanging Brock’s world map higher then normal behind the TV above the dresser. Lately, I infused the space with the outdoorsy, artistic, relaxed vibe they told me they were looking, with lots of plants, photos from their travels, casual bed linens, and accents of brass. Overall, I’m thrilled with how the space came together! And better yet, my sister, Kimberly, and her boyfriend, Brock, love the room!
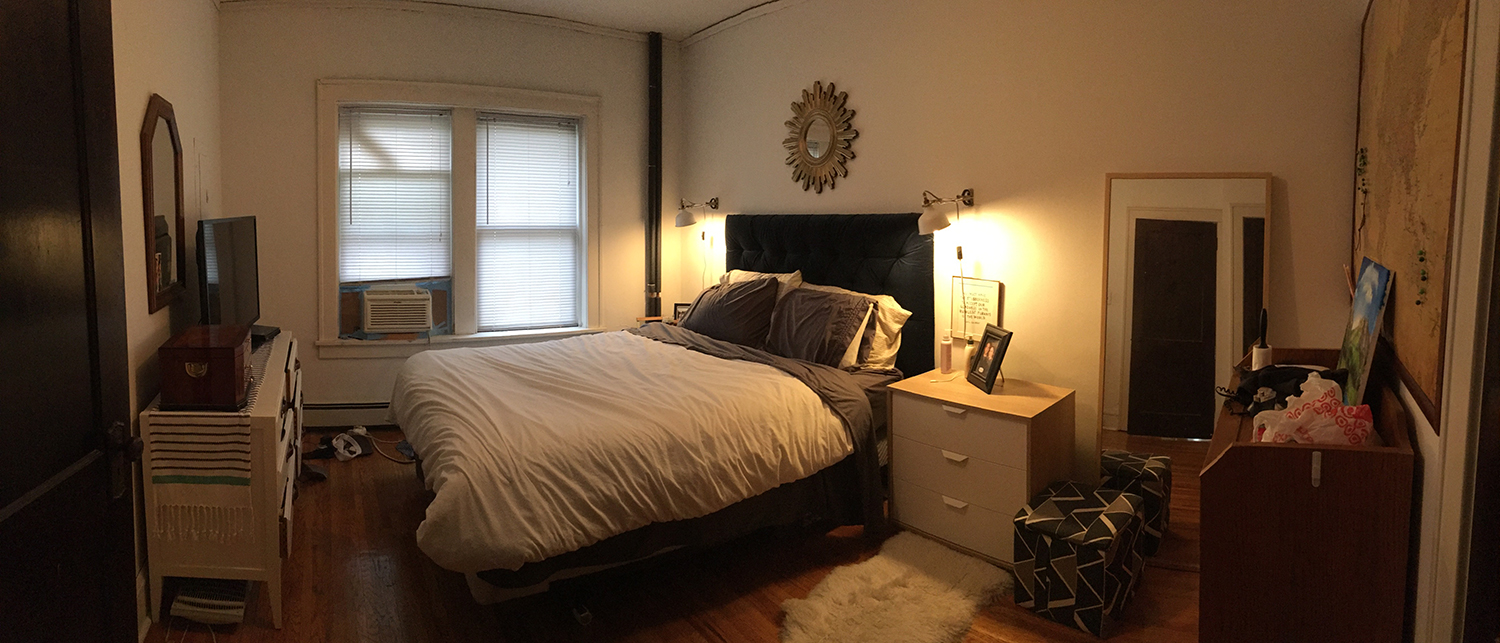
And back to the after…
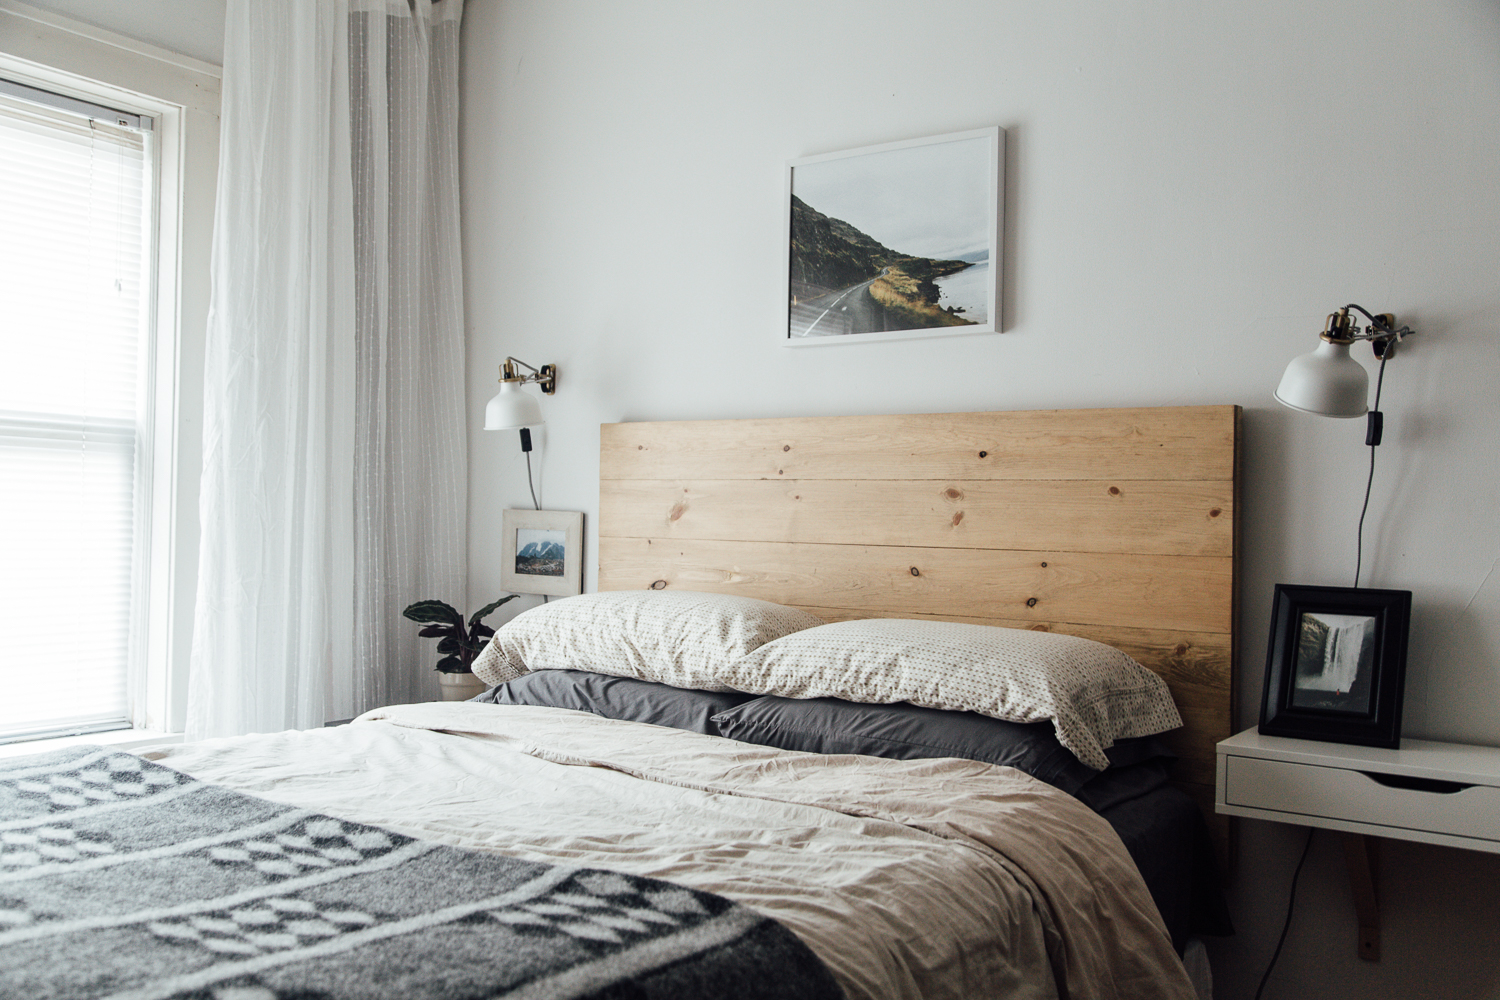
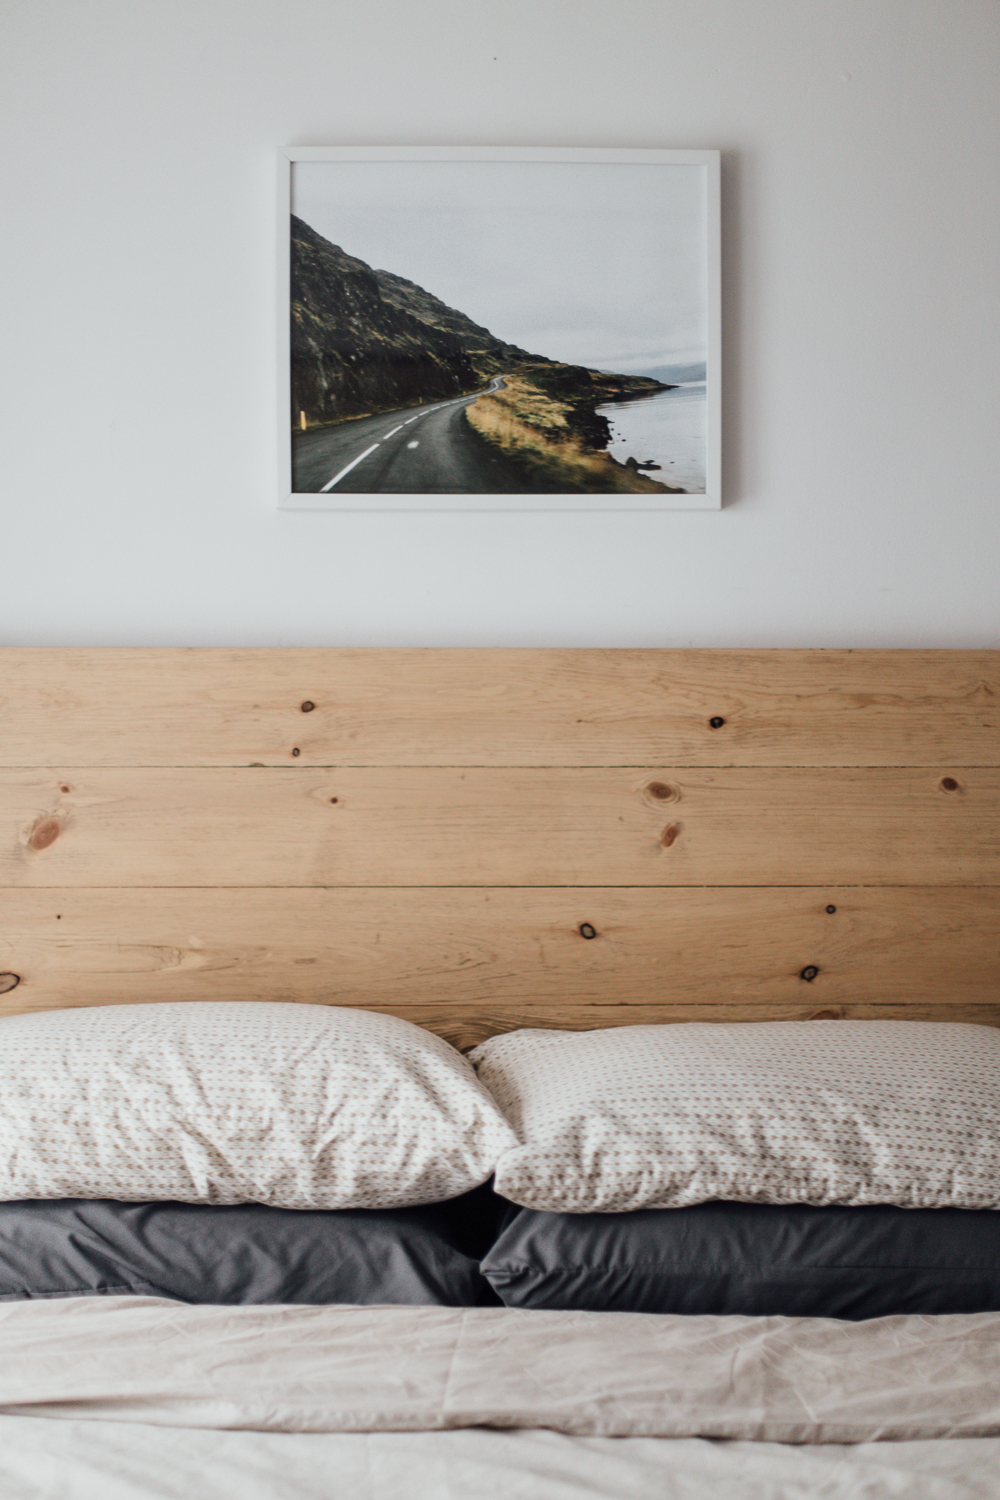
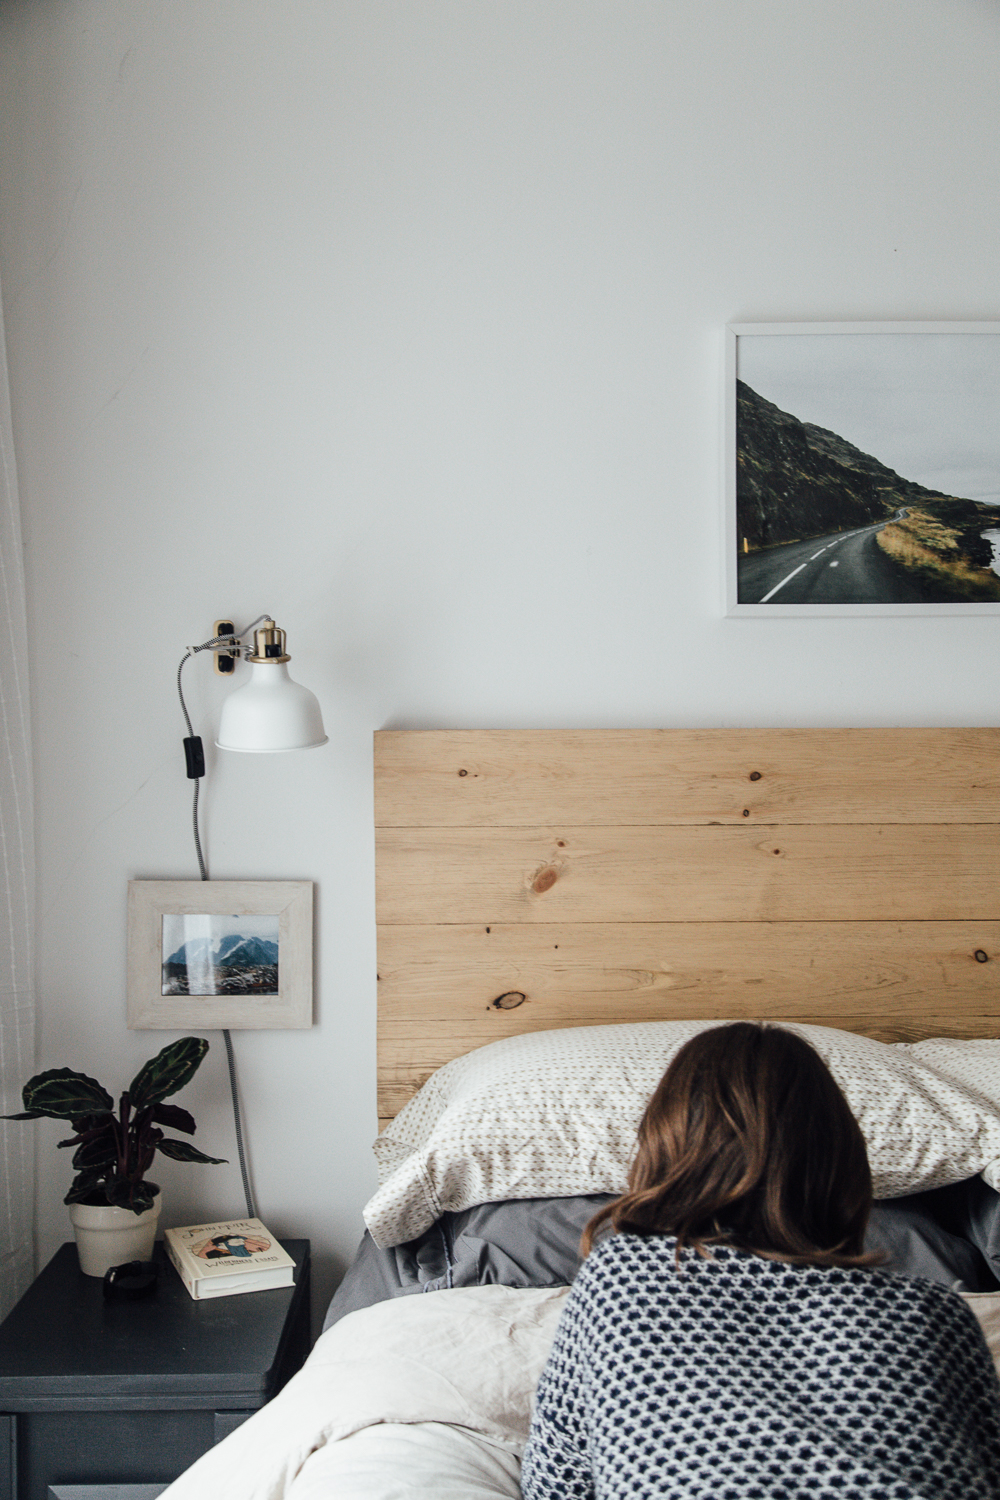
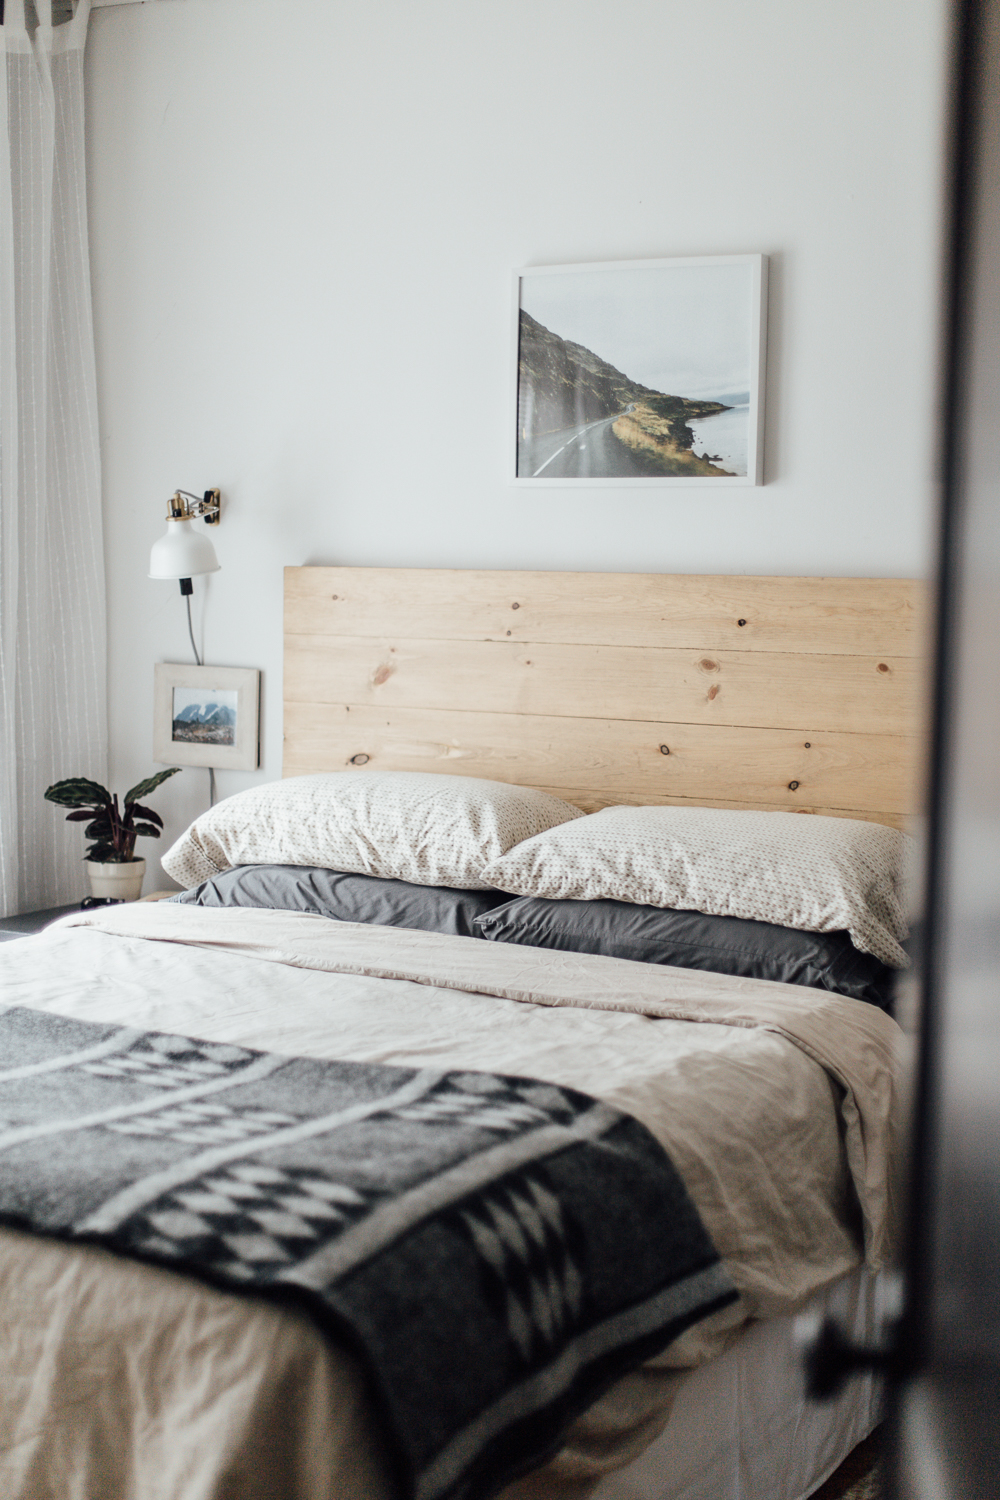
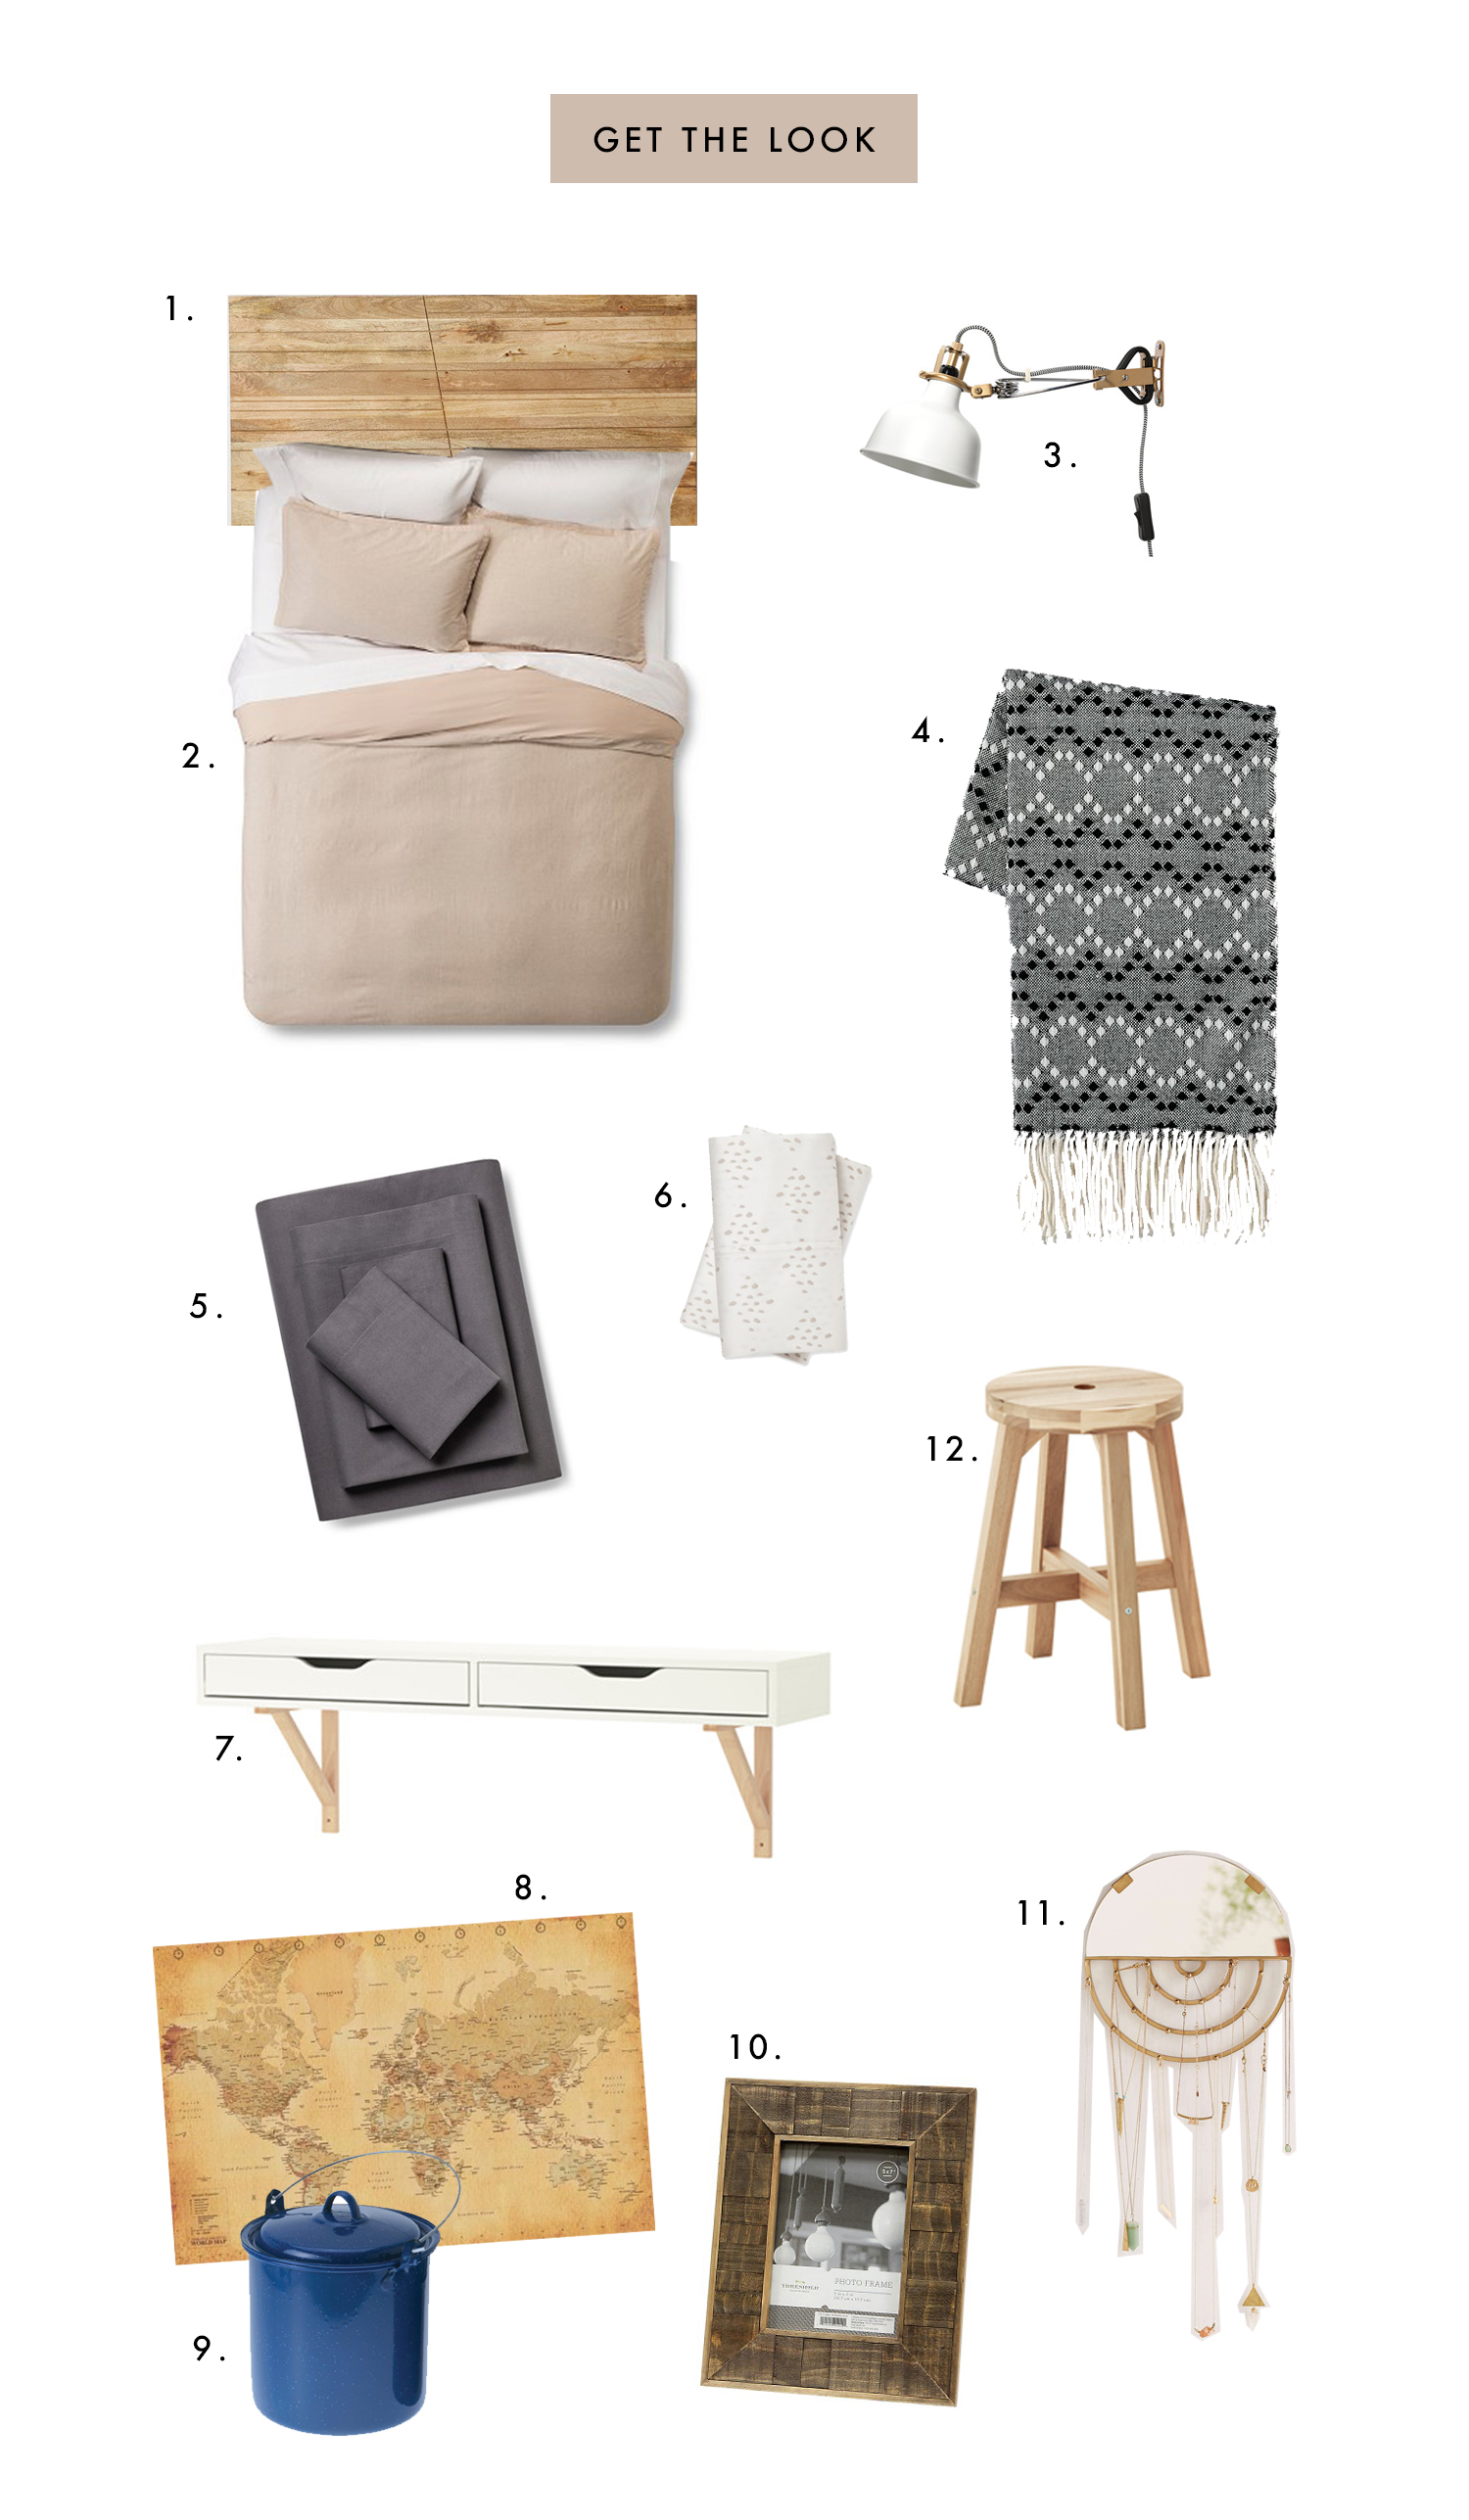
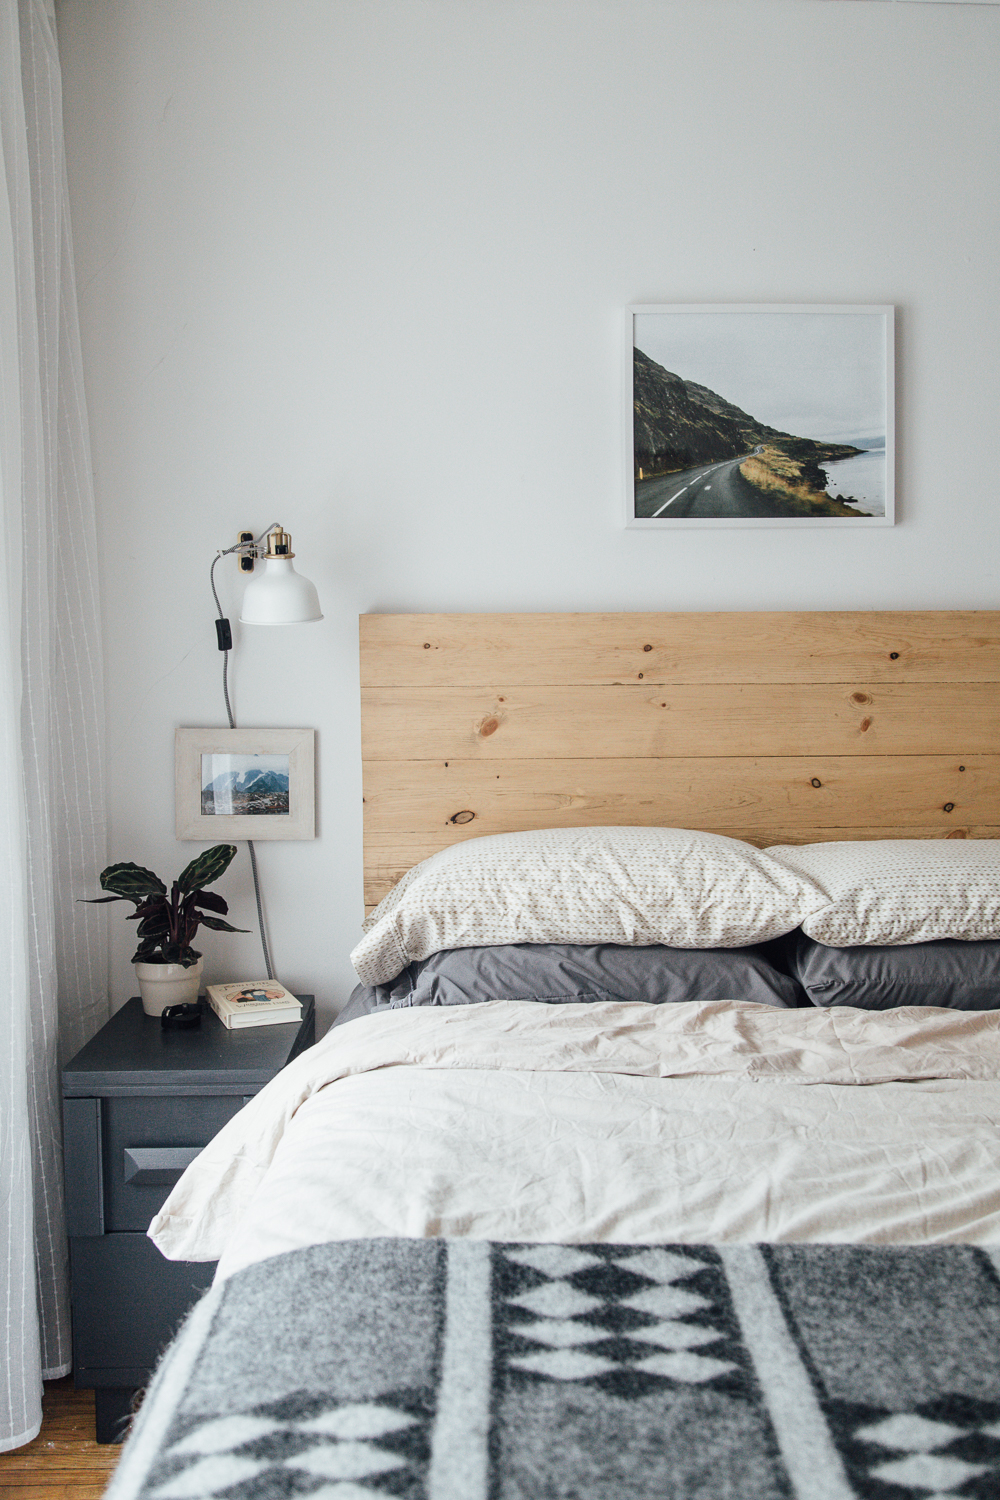
1. HEADBOARD
The headboard in Kimberly’s bedroom is a DIY we did with leftover wood I had in my garage. If you don’t want to DIY your own this headboard from Urban Outfitters nearly identical!
2. LINEN DUVET
I love the relaxed sophistication of linen and it pairs well in their space, adding a modern touch. We found the duvet on sale at Target – score!
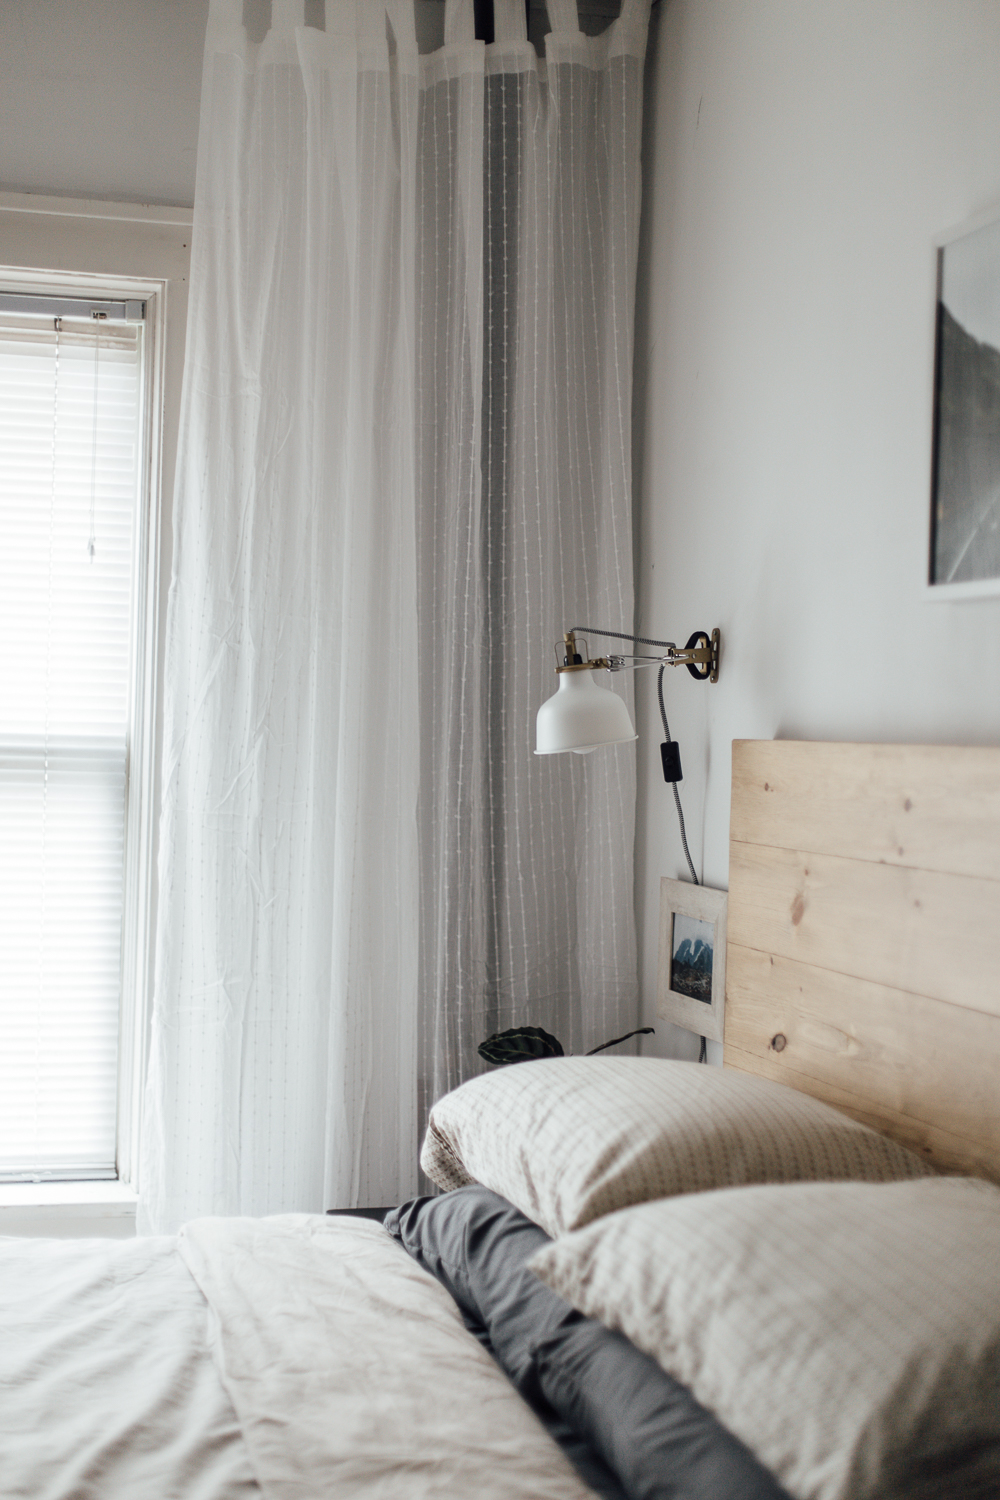
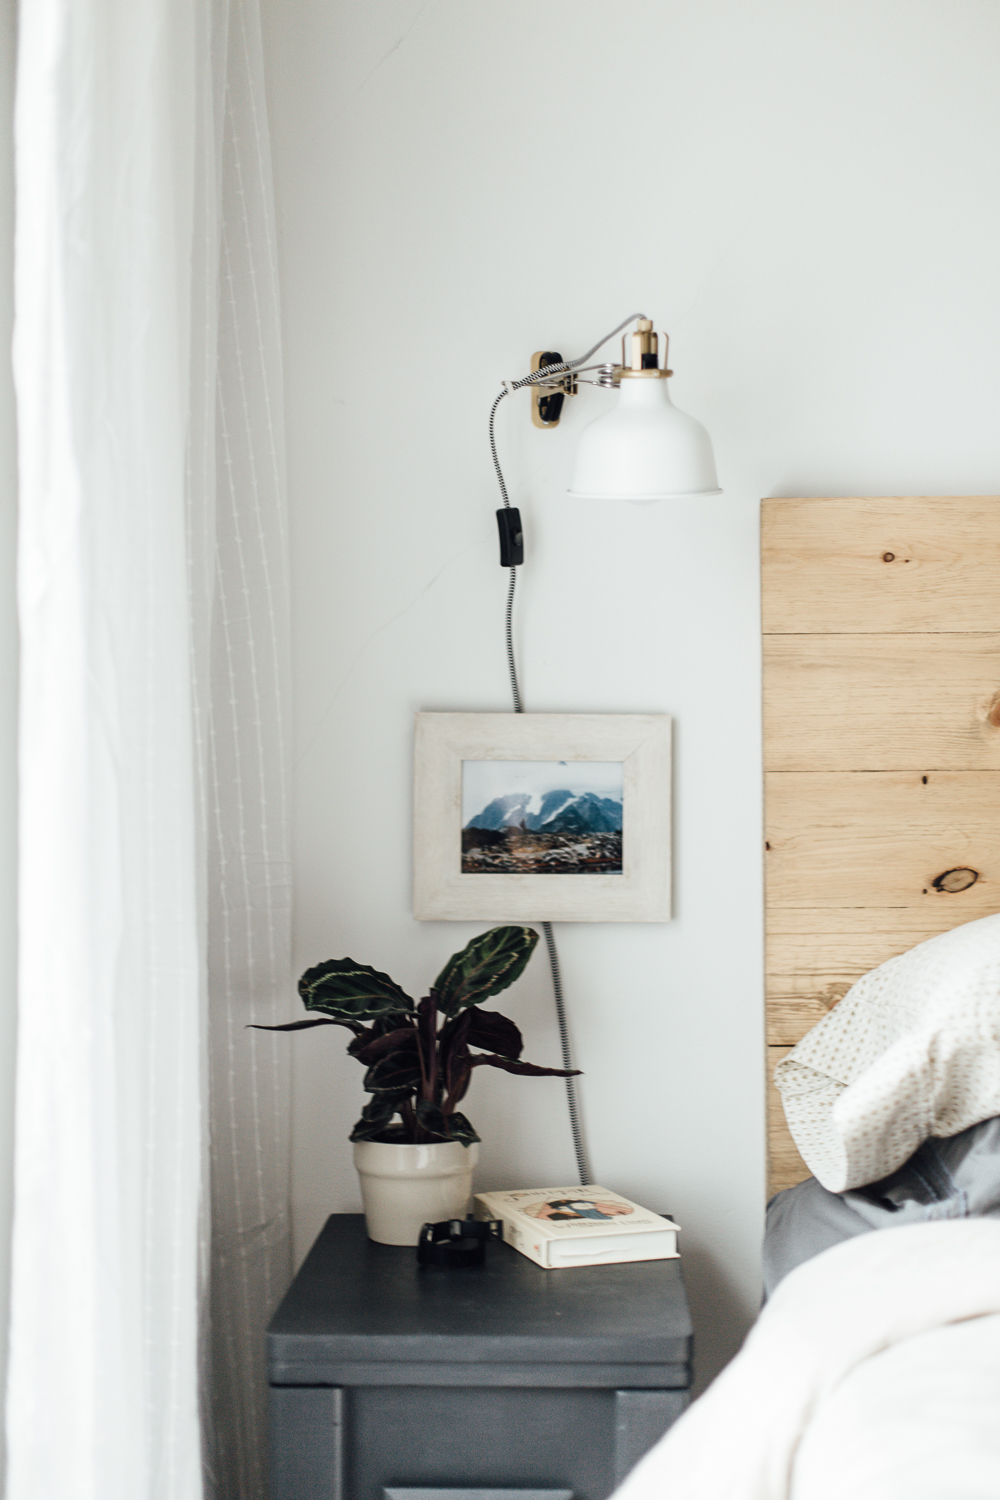
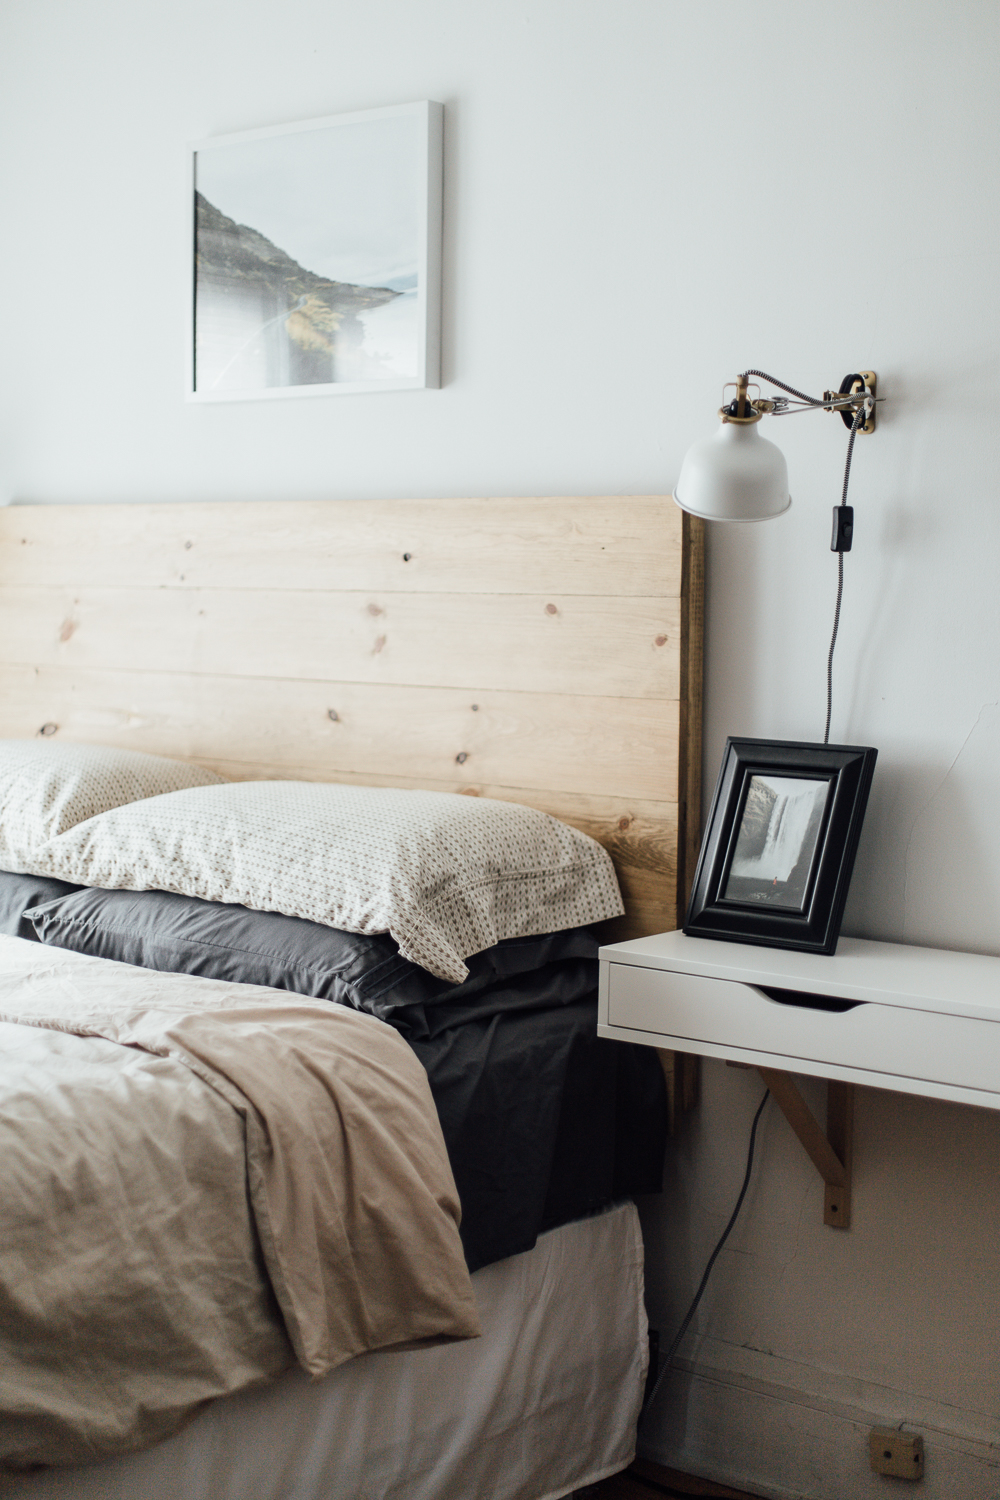
3. WALL SCONCES
They already had these wall sconces from Ikea in place. They keep the look modern with a touch of industrial, which is nice balance to the more rustic, outdoors vibe going on in the room.
4. THROW BLANKET
Kimberly and Brock recently returned from an amazing road trip around Iceland, where they bought that amazing blanket. I found one from West Elm that has very similar feel.
5. SHEETS
They already owned this pair of dark gray sheets and we loved the contrast between the natural linen color. Plus, it pulls together some of the darker tones spread throughout the room.
6. PILLOWCASES
These pillowcases add a subtle pattern and bit more warmth to the room.
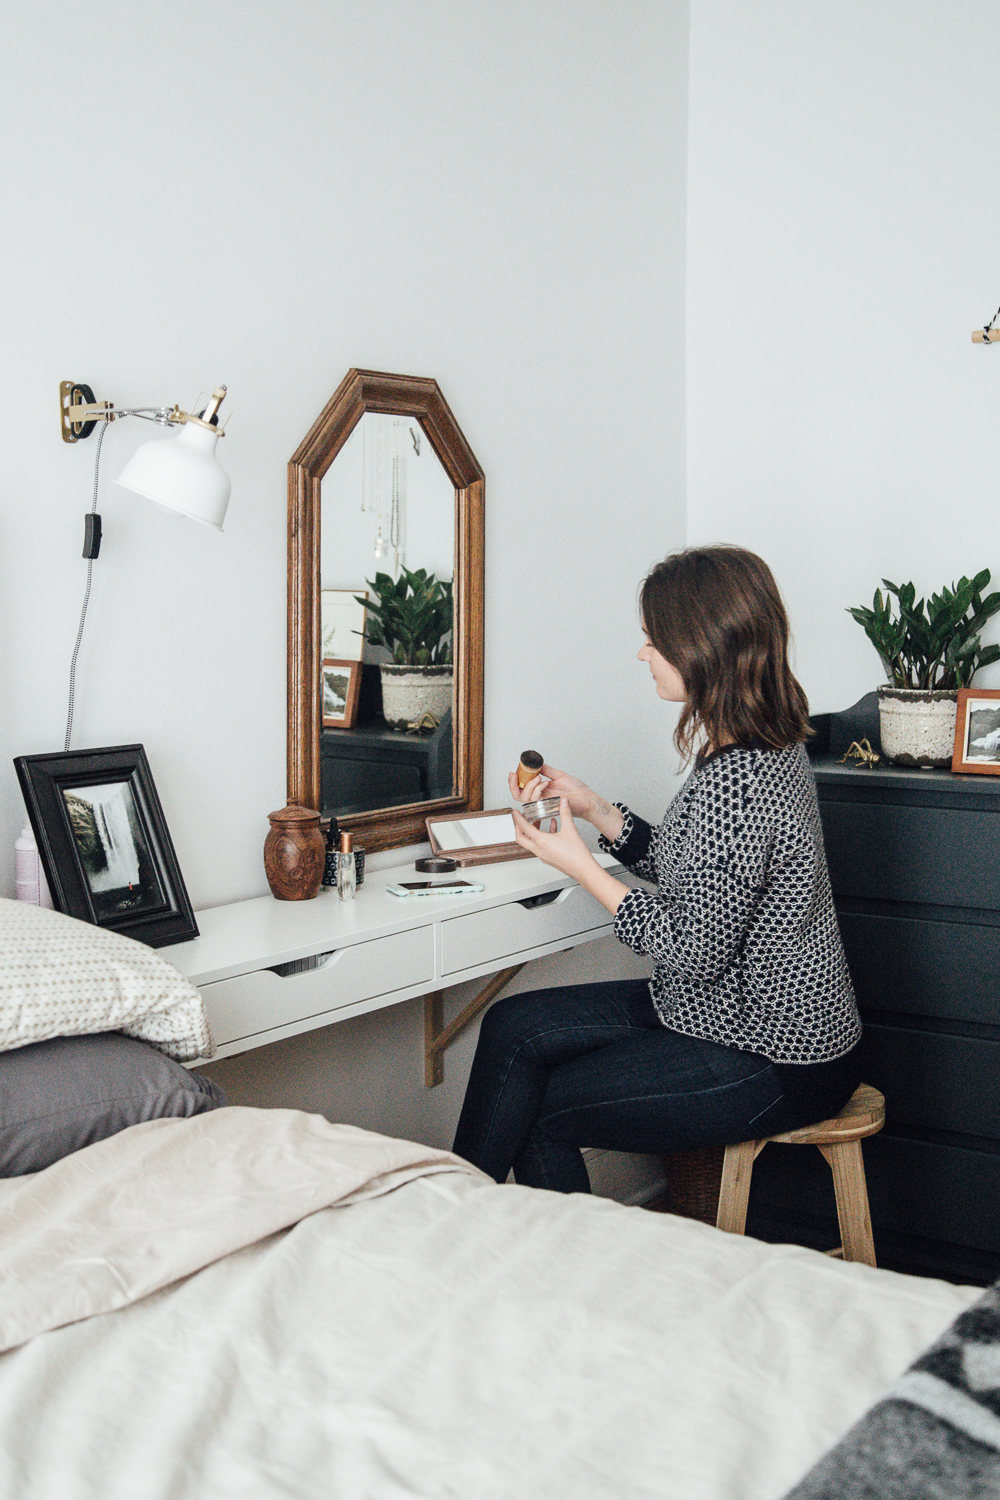
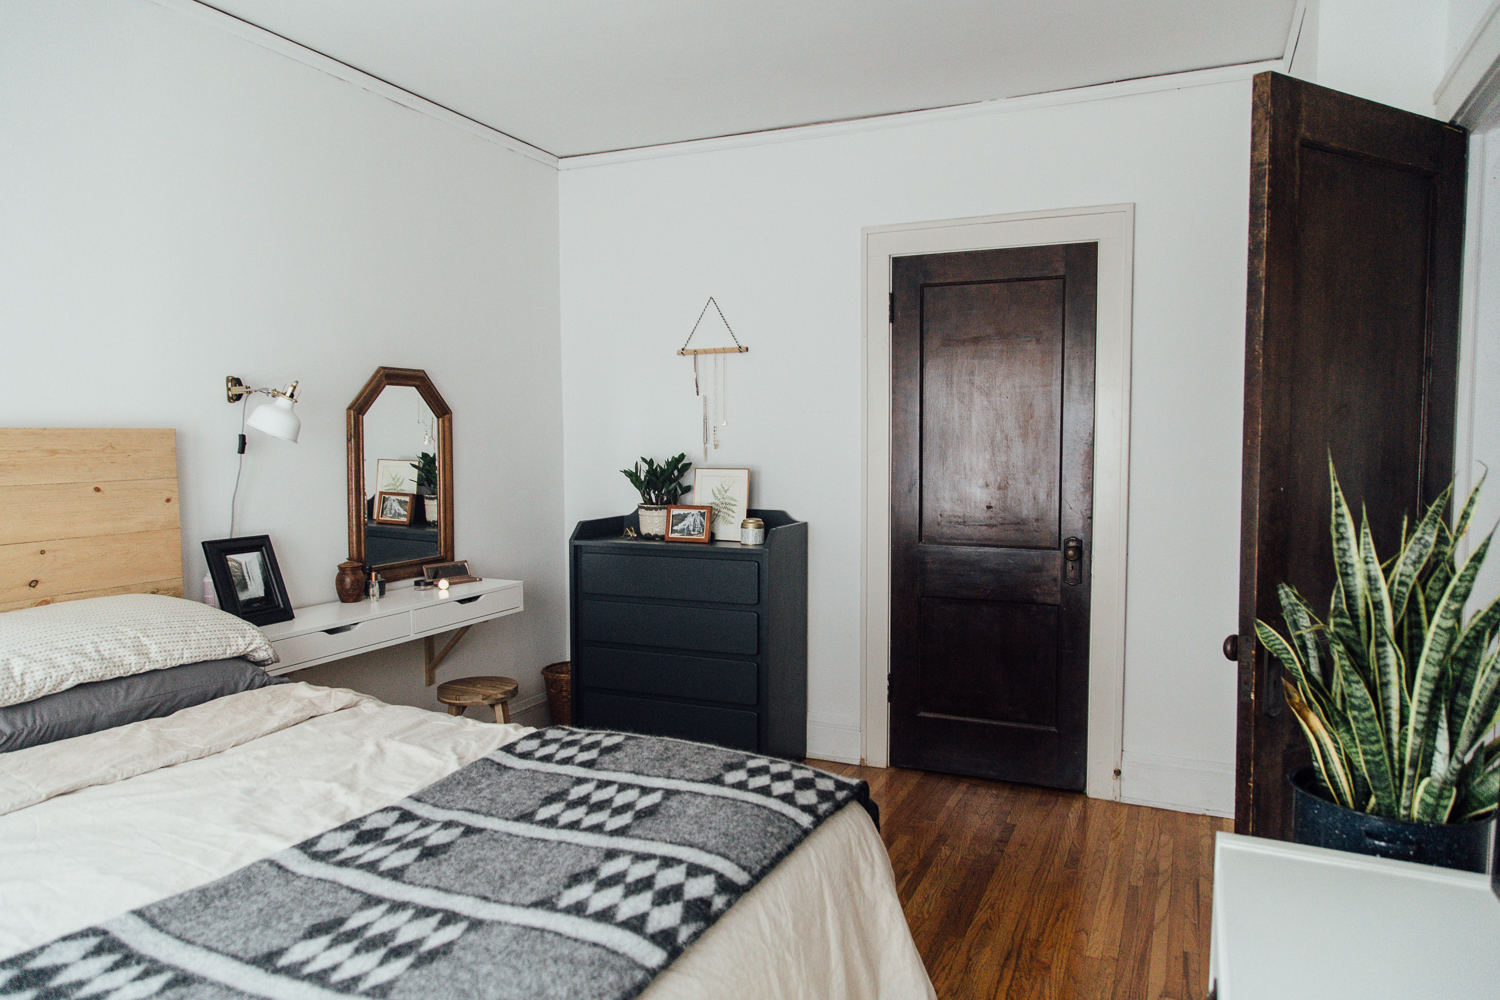
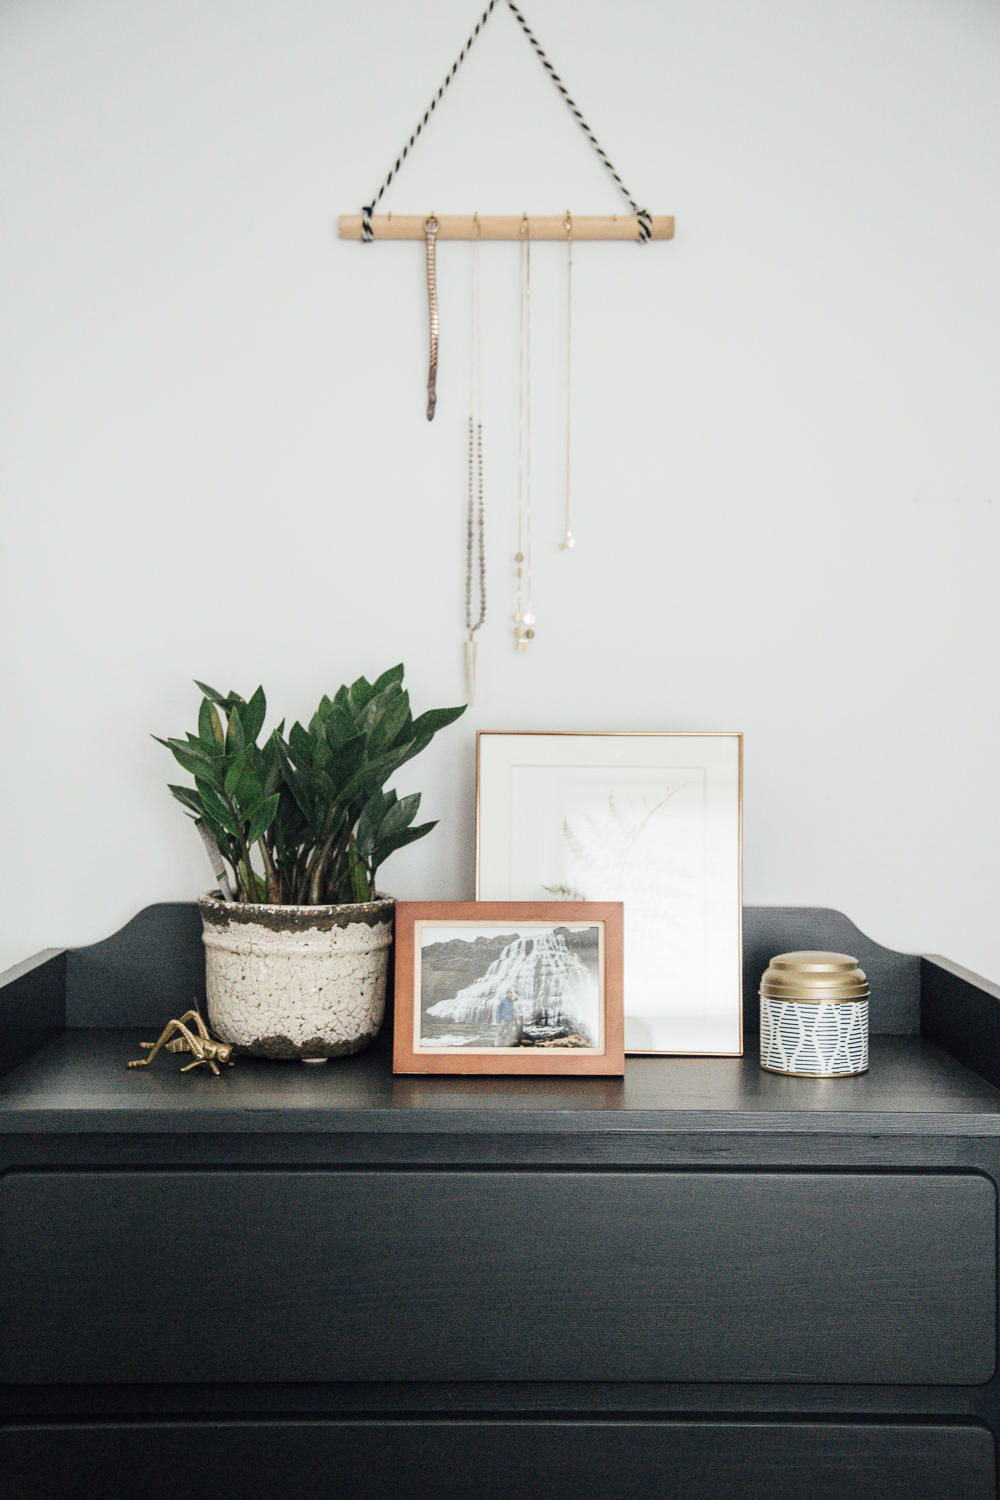
7. NIGHTSTAND & VANITY
This was the biggest design hurdle in the room. Kimberly really needed a functional space to get ready in the mornings and wind down at in the evenings. There wasn’t room for a separate vanity and nightstand in the space. Just would’ve been wall to wall furniture, which would’ve made the room feel crowded. The best bet was to combine the vanity and nightstand as one functional piece! I found this wall shelf with drawers at Ikea, added a stool, and like that we had a super functional piece that doesn’t take up too much visual real estate in the bedroom!
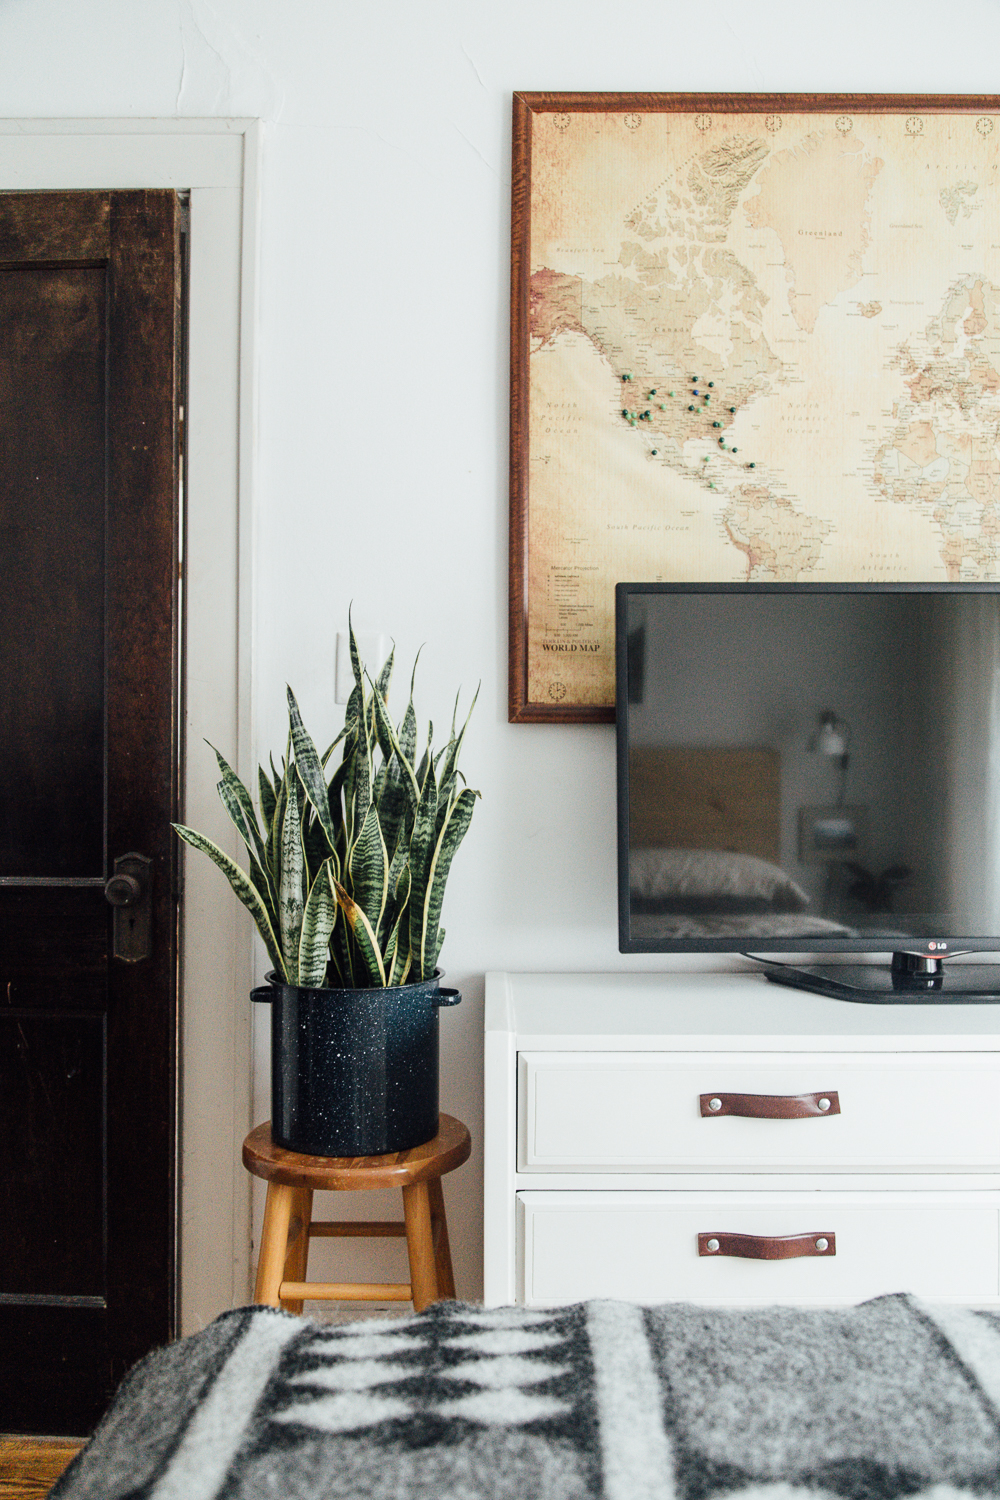
8. WORLD MAP
Moving the map above the white dress showcased their tall ceilings, plus the scale was way better over there!
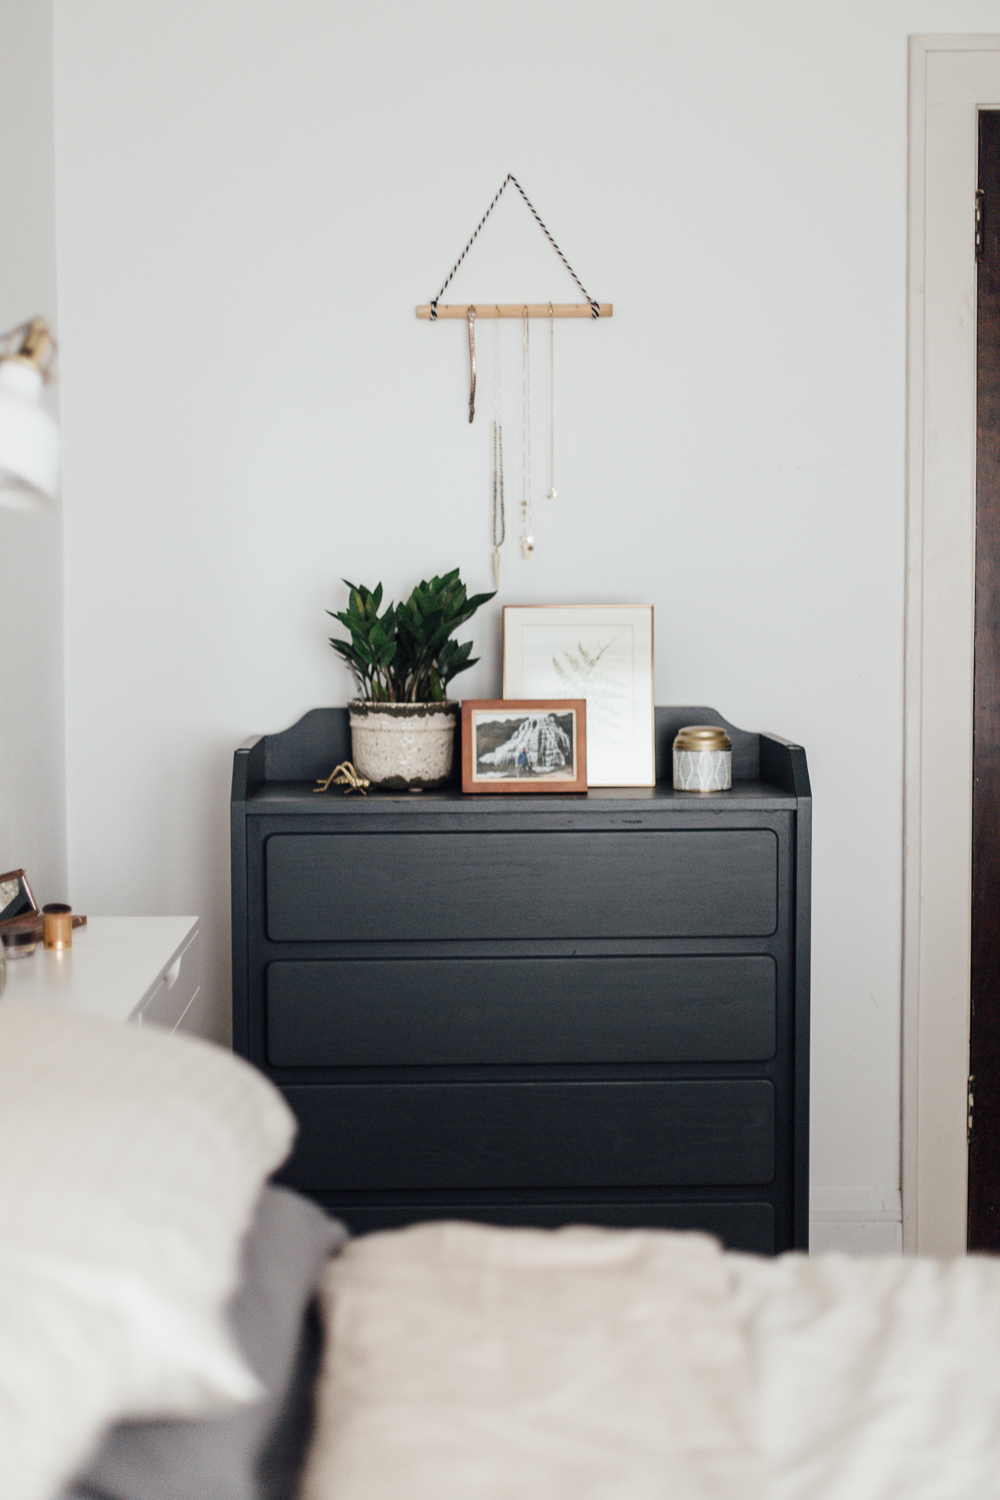
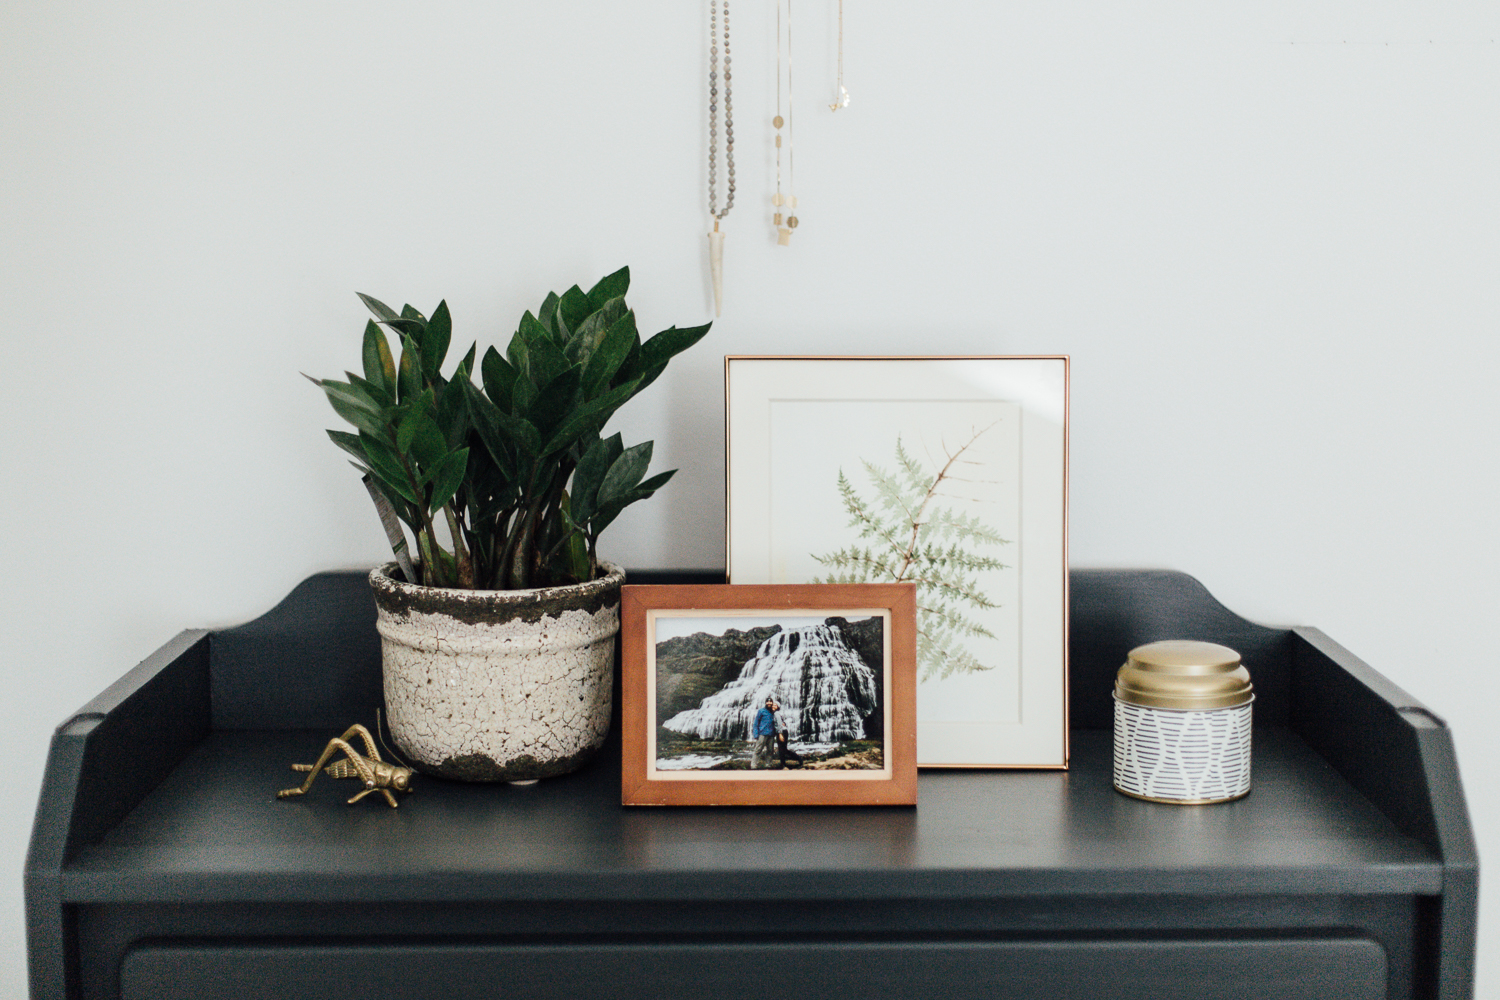
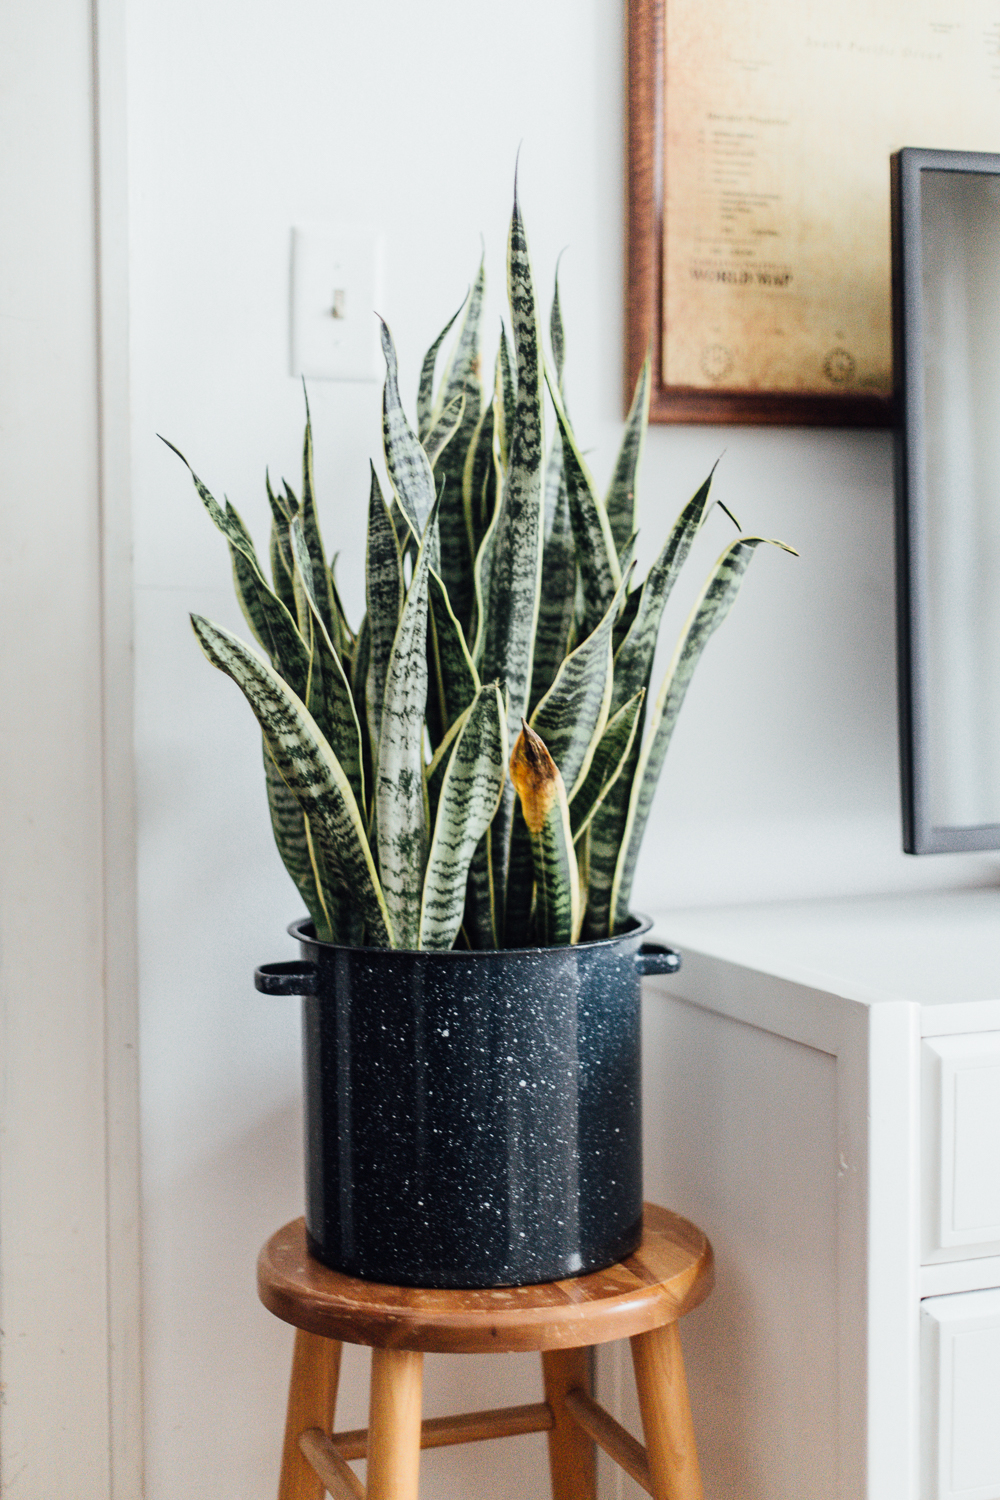
9. CAMPING PLANTER POT
This was a super cheap thrift store find. Planters can be expensive, so sometimes you just have to get creative.
10. FRAMES
The frame Iceland photos above their bed is from Ikea, a few were thrifted, some they had around their house, and a think one was a new purchase from Home Goods.
11. JEWELRY ORGANIZER
We made a DIY jewelry organizer with a dowel, a few gold nails and some yarn. Super cheap and really easy, but I spotted this one that I love if you aren’t into DIY.
12. VANITY STOOL
Another affordable Ikea find! I had a pair of these stools that I used in our master bedroom when we first moved in since we didn’t have nightstands yet. So, when I finally found nightstands for our bedroom I just had these stools laying around our house.
– SHOP THE POST –
[show_shopthepost_widget id=”2049724″]

It’s beautiful! I love the colour palette so much <3
Oh wow! It looks absolutely amazing! I love all the greys and neutral colours around the room. I’m always a little scared about coloured sheets but I love the grey ones here! I love the idea of the little wall shelf too!
xo April | April Everyday
I love the DIY headboard! Do you have a specific place I can go to with step-by-step instructions of how to do it?
Where did you find the curtains?
I’ve looked and maybe I’m missing it, but could you tell the paint color for the dresser that is under the jewelry hanger? Thank you!
I believe is Lead Gray by Benjamin Moore!
Hello! Love so many pieces! Where is the art over the headboard from?!
It’s a photo she took on a vacation to Iceland framed in an Ikea frame!
Adding a fresh coat of paint or refinishing existing cabinets can make all the difference, as proven in this bathroom makeover by Cynthia Harper Living. With a little sanding, some clear matte sealant, and a little elbow grease, she completely changed the look of her previously orange-ish builder grade vanity cabinet. Reworking what you already have is an ideal way to stick to a budget with minimal upheaval. Organization is key, especially when it comes to small spaces. So, when it came time for Kitty Cotten to design her sister s bedroom, she immediately addressed the issue. A dual-purpose vanity with drawers created a much-needed primping station with storage, while wall sconces on either side of the bed freed up space on the bedside table for nighttime essentials instead.