

How to Remove Wallpaper Without a Steamer
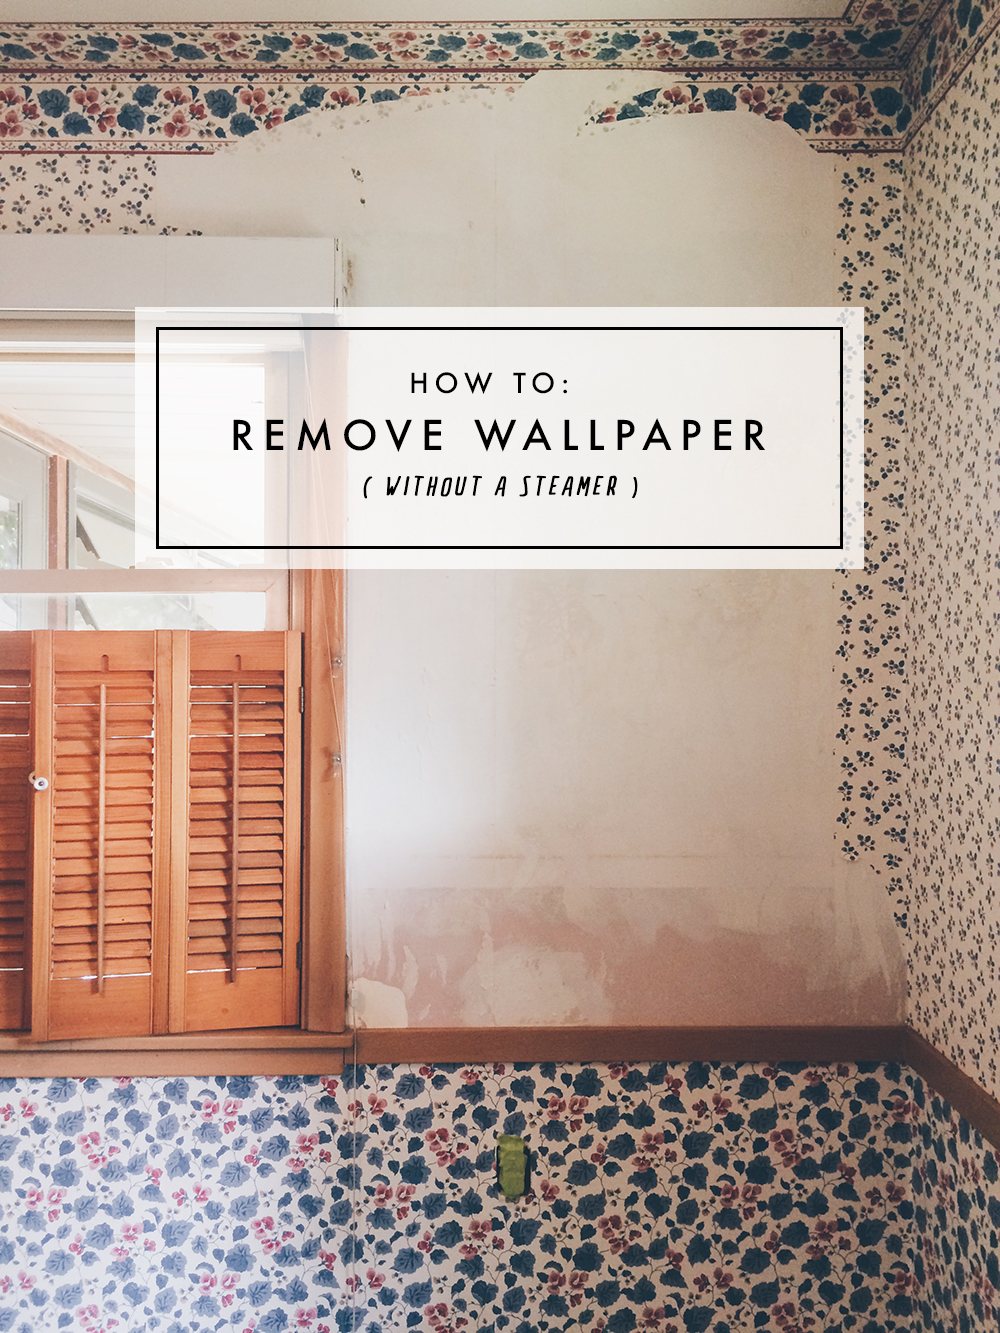 If you remember from the before tour of our new house, you’ll know nearly every inch of our place was covered in wallpaper. The old lady who owned the house before us had a deep love of wallpaper. There were only like 15 different patterns going on and even a border on the ceiling in the kitchen, but who’s counting?
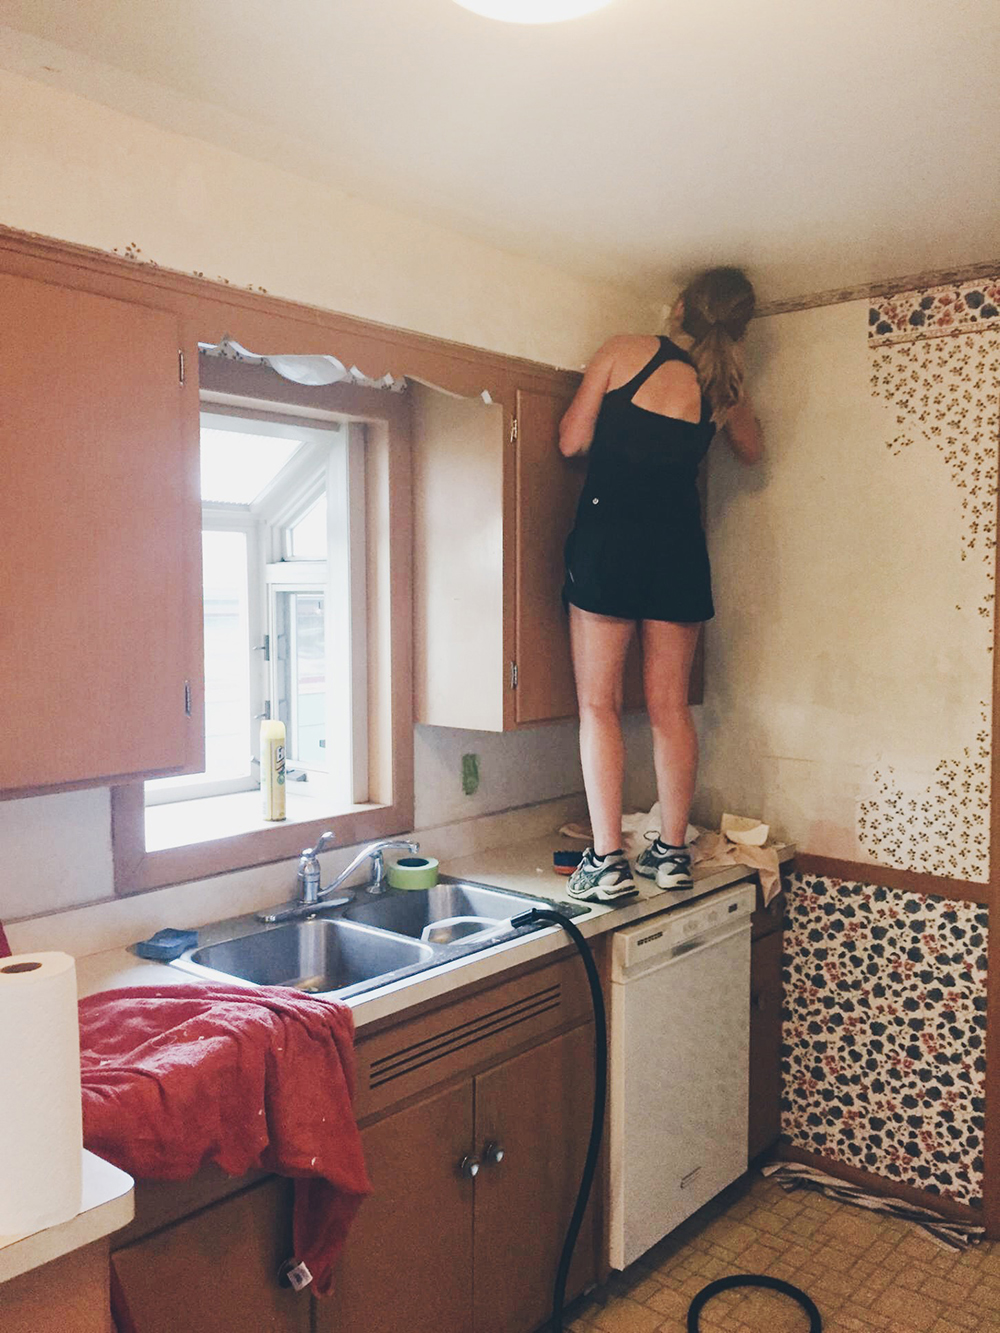
Task number one after we closed on the house was remove all the wallpaper before moving in. A tall order. I search endlessly on the internet to find the best way to remove wallpaper, the suggestion was always a steamer. Joel and I bought ourselves the best rated steamer on amazon, plus our realtor gave us one as a home warming present. We thought we were set to rock and roll off that awful 80’s wallpaper, but very long 3 hours into the job and only a few sheets off wallpaper removed we were desperate to find a quicker, less tedious way, and one without the scalding heat of a steamer. It was the last weekend in July in Minnesota and we were baking in our kitchen trying to take that damn wallpaper off.
A good friend of ours, who is also a residential painter, stopped by our house to see the place after we closed and laughed at us with our steamer. He told us were doing it all wrong and said he’d come help us that Saturday to show us a better way. And thank god he did! He showed us how to easily remove that pesky wallpaper without a steamer. It was wonderful, well, as wonderful as taking down wallpaper can be.
WHAT YOU’LL NEED:
(Links to the specific products we used)
– Large pump sprayer
– Fabric softener
– Wallpaper scoring tool
– Wallpaper scraper tool
– Painter’s plastic roll
– LOTS of patience
STEP 1:
Cover your floors and baseboards with the painters plastic roll to protect from water, plus it makes for easy cleanup. Also tape off any outlets to keep water out.
STEP 2:
Score the walls with the wallpaper scoring tool. Don’t push too hard because it will tear the wallpaper to shreds, which makes it rip off in tiny chunks. Instead, just medium pressure to knick at the surface. This will help the wallpaper absorb the water mixture allowing it to soften the adhesive on the backside of the paper.
STEP 3:
Fill your pump sprayer with warm to hot water then add a generous amount of fabric softener, about 2 caps full. You don’t need a special fabric softener brand. I would just suggest a scent you like because you’re house is going to smell that way for a while. The fabric soften is essential, because it helps the water cling to the paper and helps to soften up the surface quicker then just plain water.
STEP 4:
This is were that patience comes in. Spray the scored wallpaper from top to bottom, then wait. Repeat. Repeat. Repeat. What we did was work in 2 rooms at a time. We sprayed one bedroom then moved to the other bedroom and sprayed that one. Then, returned to the first bedroom and sprayed again. The key to this step is letting the wallpaper soak to soften the glue behind the paper. Try to pull the paper too early without enough water and time to soak and you’ll just end up taking off the decorative finish, leaving the paper backing and glue still on the walls. And that’s a huge pain to remove. So, be patience. Spray. Let soak for a bit, then repeat about 3 to 5 times depending on the wallpaper. It will take time and you’ll want to rip it off early, but wait. Seriously. You’ll know when you’re ready to start pulling at the wallpaper when you can super easily peel up a few corners on different sheets around the room with just you thumb and no pressure.
STEP 5:
After you pull off the wallpaper you’re usually still left with a little bit of glue on the walls. We sprayed them again, only about once or twice to soften the remaining glue, then with the wallpaper scraping tool, scrape off the leftover glue. It was messy and kind of gross, but a necessary step before you paint. If glue is left on the wall’s surface paint will crack and flake off. We learned this the hard way in one room.
That’s it! The process is simple and the tools are cheap, it just takes time and patience. So, grab a beer, pump the tunes and start soaking that wallpaper. With the help of 2 friends, we got through 5 rooms in a weekend, which was amazing because it took Joel and I about 7 evenings to remove the wallpaper from our kitchen with the steamer method!
BONUS TIP:
If you have old plaster walls like us that don’t have the best texture after removing wallpaper you can prime them with XIM Peel Bond Primer. It’s a clear gooey paint that dries clear that will help seal the walls and helps to level out the surface. It won’t work miracles but it worked great in our kitchen where the plaster was cracking slightly and the walls were overall is rough shape.
Such a huge help!!
From your new subscriber 😊